Thursday, 26 June 2014

Nutella Bread and Butter Pudding - Yes, it's Gluten Free!

It's no secret that I love Nutella and that the only reason why I don't buy those ginormous jars of Nutella isn't because of price, but because it would mean I would need a whole new wardrobe. And who can be bothered with that. Everything in moderation, blah, blah, blah.

Anyway, the point of this post is to share a recipe I've tested out a couple of times, and one that's perfect for those cool, crisp and wild wintery days. Nutella Bread and Butter Pudding! Minus the butter...and this version is gluten free. I was inspired to create this version when I stumbled upon this one. Read on for the list of ingredients and method:
It's not pretty, but it's pretty delicious!


Ingredients:


1 loaf Gluten Free Bread*
1 jar of Nutella - be generous
400ml milk
600ml thickened cream
5 eggs
100g maple syrup**
dash of Marsala***
butter for greasing the baking dish


* I baked this loaf using Laucke Flour Gluten Free Bread Mix.
I also added the chocolate bits just in case the pudding wasn't chocolatey enough.
You can use store bought bread or your own bread recipe.

Method:


1. Preheat oven to 180 degrees celsius (fan forced)
2. Grease a largish baking dish with the butter. Generally gluten free loaves are smaller than standard loaves, you will still need a large baking dish.
3. Spread a generous amount of Nutella on each of the slices of bread, then cut into triangles. Don't be tempted to cut multiple slices at a time as Nutella is very sticky and the gf bread crumbly. Be patient and slice each piece one at a time. Or maybe use a sharper knife...maybe my cutting skills leave a lot to be desired...

Don't skimp on the Nutella. Be thorough in your coverage.


4. Arrange the Nutella triangles in the baking dish. You can be as neat or as messy as you like. Overlap the bread if that's what's going to make you happy. Sprinkle that dash of Marsala over the Nutella triangles. Consume any leftover Nutella triangles that don't fit into the baking dish...it would be rude not to...

Pack those Nutella triangles in together!

5. In a pan, pour the milk, cream, dash of marsala (yes, another little dash), the maple syrup, give it a stir and heat. While you wait for the mixture to come to an almost boil, whisk together the eggs. Gently pour the egg mixture into the hot milky mixture, whisking the whole time. Remove from the heat, whisking as it starts to slightly thicken. I then poured this mixture into a jug, with a spout, then carefully saturated the Nutella triangles. I could have poured the mixture straight from the pan onto the Nutella triangles, but I would have made a mess and I would have spilt the mixture all over the bench, it would have dripped on the floor, I then would have slipped on it while reaching for the paper towels to clean the mess up. The doorbell would have rung at that very moment and my friends would have arrived and been shocked at the mess and the ruined dessert and would have probably returned to their car and would have gone home, upset that their afternoon of eating a yummy dessert had been crushed. I wouldn't have been able to cry, as everyone knows you shouldn't cry over spilt milk. So, bearing all this in mind, it was easier to pour the mixture into the jug to begin with. You may not need to do this if you're not as clumsy as me.

Ensure all the bread is soaked with this warm eggy mixture.
6. Place the baking dish into a larger baking dish and half fill that with water. Cover the dishes with aluminium foil and place into the oven for 15 to 20 minutes. Test at about the 15 minute mark. If the mixture has set, then by all means turn off the oven and let the pudding rest while you gather the biggest bowl you have and grab the double cream from the fridge. If it's still not set, then be patient but don't get too distracted - you don't want to dry out the pudding by overbaking it! Once the pudding is cooked, then serve with some double cream or ice cream and enjoy!


Notes:

* There are quite a few gluten free ready baked breads on the market now, so you can choose from one of those. I've been baking some different varieties, but have found with a recipe like this one, sticking to a traditional style bread works best. Again, there are several gluten free bread mixes you can experiment with and I've had success with a few of them. I've also baked from scratch, but find these breads to be a lot heavier than traditional bread.
** You don't need to use maple syrup, you can use any sweetener of your choice. I tend to make this recipe for friends and so add the extra sweetener for their benefit. If you're trying to watch your sugar intake - which would be hilarious with a recipe such as this one - then eliminate the additional sweetener altogether.
*** Marsala is my dessert cooking wine of choice. You may prefer to use Kahlua or Frangelico or not use any alcohol at all.
Another note, you can make variations of this recipe - if you have a friend who, for example, doesn't like Nutella (is that even possible?  have you heard anything so preposterous?) (sorry P!!!) then butter and jam can be used. Sultanas or raisins can also be added, as per the original recipe that inspired this experiment.


I hope you try out this recipe, and if you do, then drop me a line and let me know how you got on with it. Do you experiment with recipes? What's your favourite Nutella recipe?

Friday, 21 March 2014

Here We Go Again...

Perhaps the full moon can explain the strange goings-on around me this week. Goings-on that have made me raise my eyebrows a few times, smirk just a little in amazement and slightly nod at the oddities. Whatever has caused the out-of-character behaviours, I will now be adding to them by posting on this blog once more - where I was so certain this blog would be in indefinite hiatus for reasons too boring to mention, I've changed my mind. When I spoke out loud to a couple of people about blogging, I realised that I missed rambling on about nothing and that not posting was more stressful to me than posting. Work that one out.

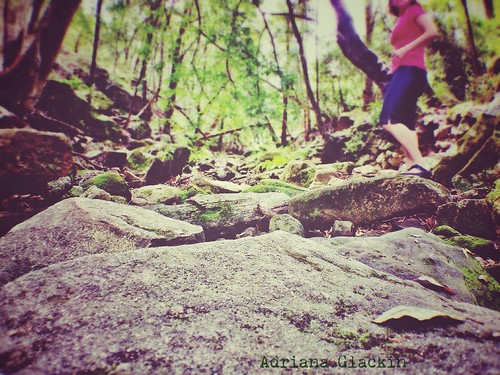
The pathway leading to the creekbed was littered with what seemed to be blueberries.
Lots of them. I wondered who would misplace so many blueberries.

So let me share here my photography project for 2014 --- 52 themed self portraits. I resisted for the first few weeks* until I realised that the photos fitting the themes had been taken by default and using my iPhone **. We are now in Week 12 and have to admit that I am actively participating in this project, and no longer reluctantly. The theme for Week 12 was "The Great Outdoors". Living in the Blue Mountains and surrounded by endless bushland gorges made this week's shot a no-brainer. Time was my only issue so I used the small window of time I had to seek out this quiet creek bed, set up the iPhone on the teensy little tripod I bought online, set the camera app to self timer and get into position without slipping on the mossy rocks. I discovered the interval timer on the app which meant I didn't have to run back and forth to the iPhone - what a win! To edit the shot, I used the Snapseed app and the Camerabag app - both pretty flexible editing tools.

In the midst of this week's chaos, disorder and busyness, "The Great Outdoors" theme was perfectly timed, much needed and much appreciated. Ahhh, feel the serenity!


* Aren't I getting a bit long in the tooth to be taking selfies? Yes, yes I am, and what of it?
** That's really the challenge here I feel, can I take 52 self portraits that won't look like quick grabs you would normally take when out with your girlfriends? Can I make them look "arty"?

Wednesday, 20 November 2013

A long time between posts

Sydney Ride to Conquer Cancer 2013
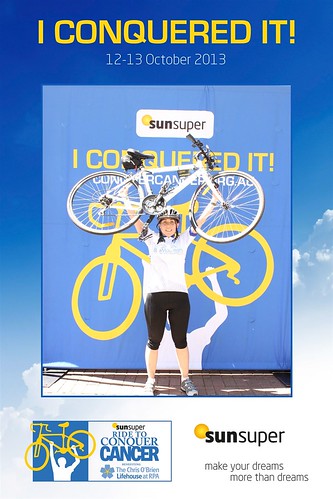
Yep, that's me in lycra holding up my bike at the end of the 200km ride
Life has been very busy and I've allocated very little time to blogging. The way the end of year is shaping up, it looks like it will be a while again before my next post. I did, however, want to update you with the result of My 2013 Challenge. If you followed the link, you'll see that I was a member of Team Blue Magic. Our goal was for each rider from our team to reach the fundraising target of $2,500.00 each in order to participate in the 200km cycle. I can't tell you how proud I am to say that not only did we reach - and exceed our target - we all rode AND all completed the ride! Camping overnight, using port-a-loos and port-a-showers for the first time was a claustrophobic and eye-opening experience I don't want to repeat again in a hurry, but the weekend was amazing!! Team Blue Magic are the Best Team Ever!! Even more amazing was that our little team of 8 riders raised over $32,000 for The Chris O'Brien Lifehouse in Sydney.  I'm so very proud to have been part of that team and if you happen to be one of the many people who donated, then I thank you from the bottom of my heart!

So, for now, this blog will remain in hiatus until the merry-go-round that is life slows down so I can catch my breath and start up blogging again. I'll still be around the net, commenting, posting images, tweeting... Blogging will simply take a backseat. Ta ta for now. x

Tuesday, 11 June 2013

Linky Love #4


It's been a while since the last Linky Love and I'm sitting here editing photos from several weeks ago. The computer is being slow, an eclectic mix of music courtesy of iTunes shuffle is playing in the background and I thought I'd add another task while I sit here and wait for the computer to catch up - one image at a time.

One of these days, I'm actually going to use this handy little generator  and create magical things.

I've be blown away by the sheer cleverness of some people.

When I've been in the kitchen, I've been making all sorts of variations of this recipe. Totally nomalicious!

Long summer days are a memory ago as the winter chill is making itself felt around these parts. In life's busy-ness, I didn't share this little iPhone feature with you. My image is the fourth amongst the fifteen finalists for that week. Ahhh, summer...how I'm counting down the weeks....

If you have some spare cash floating around, I'd love for you to donate to this worthy cause. The date is getting closer and I need to reach my target, or I don't ride - yikes!

And a final bit of silliness that is oh-so-clever!

Friday, 17 May 2013

Chocolate Lava Cupcakes

I dub thee 'lava cupcake' #food #glutenfree
One of the holiday batches of Chocolate Lava Cupcakes

A few weeks ago while away on holidays, I took advantage of not only being in holiday mode, but also being in a new kitchen, new oven, fairly bare cupboards and did I mention that I was in holiday mode? As there are about 20 families we go away with, we try and organise a Ladies' Afternoon where wine and nibblies are consumed, with no husbands or children in sight. And that is where this recipe was born. I had limited supplies and a couple of my friends have special dietary requirements, so I wanted to make sure the recipe would be safe for them to enjoy. I managed to make a few batches while away and before you ask - who bakes while they're on holidays - you'll see from the recipe how simple it is to whip up. No fancy gadgets required!

So where did the name Chocolate Lava Cupcakes come from? One of the hundreds of kids that belong to one of the 20 families asked if he could have a cupcake - in a most polite and sweet way, and I simply couldn't refuse such sweetness! While enjoying the cupcake he told his mum he thought the inside was like lava - all molten and gooey and delish! The name was perfect and they've been known as Chocolate Lava Cupcakes ever since. So, thank you to T.'s young son for naming these cupcakes, I couldn't have given them a better name!

There are a few variations to the recipe and I'll include those details in the notes.

Chocolate Lava Cupcakes


Ingredients:


2 1/4 cups almond meal
3 - 4 tbs cocoa powder, unsweetened
generous handful of dark chocolate buttons
1/4 cup coconut oil
3 generous tbs of glucose
1 cup mashed pumpkin
2 eggs
1 tsp baking soda, gluten free

The dry ingredients laid out

Method:


* Preheat oven to 160°
* Place all the dry ingredients into a bowl and mix together with a wooden spoon.
* Add the eggs, mashed pumpkin, glucose and melted coconut oil.
* Stir with a wooden spoon until combined.
* Place the batter into cupcakes and bake for about 15-20minutes. It will depend on size of cupcake wrappers and your oven, of course.

Adding the wet ingredients to the dry mixture

The batter's ready to be placed into waiting cupcake wrappers

Fresh from the oven. this batch made 8 large cupcakes

I allowed the cupcakes to cool before whipping them straight into the freezer

Additional Notes:


* If you don't want to use mashed pumpkin, you can use a cup of pureed apple instead. If you're using apple puree, then ease up on the glucose or it may be too sweet for you. For a wholesome Red Velvet Chocolate cupcake, add a cup of raw finely grated beetroot.
* You can substitute Honey or Rice Malt Syrup if you don't have Glucose. Some may find the recipe not sweet enough, especially if they're used to eating store bought or traditional cupcakes, so you might need to add more sweetness. You could also use Stevia, I tend not to use a lot of that as I don't like the taste of it.
* When you're testing for readiness of the cupcakes, you want the skewer to be a bit dirty, but not wet. In other words,you want to under-do them to get that lovely moist "lava" quality.
* Feel free to add things like vanilla or your favourite nuts or even date chunks. Remember, I had limited items at the time.
* If you want an egg-free version, then use 2 tbs of chia seeds to 1/2 cup of water. Stir the seeds and water and wait for the seeds to expand, forming a jelly-like goo. This can then be substituted for the 2 eggs.
* The measurements I've included are approximate and even when I make batches of the cupcakes now, I play around with the quantities.
* This recipe is Gluten-Free and Paleo-friendly.

I hope you enjoy this recipe and if you have any questions or suggestions then feel free to post a comment.


Red Bubble Gallery

Red Bubble Gallery
view my photography at Red Bubble