Showing posts with label self-portrait. Show all posts

Wednesday, 15 August 2012

Week 31 ~ Books

 Week 31 ~ Books

Late again in blogging about The Project and now of course my mind is formulating Week 33 (which is proving trickier than I had thought). The theme for week 31 was "books" and you would think I'd have plenty of them at home to choose from, but I wanted to include lots and lots more books - and without having to empty the shelves and stacking the books nicely in just the right position. That would involve dusting  the shelves at some point and I'm pretty sure that's not part of The Project.

So it made sense to go to a place that has oodles of books, stacked floor to ceiling and in piles on the floor. There are quite a few second hand book shops here in the Blue Mountains and they're run by people who are passionate about their books. For this particular week's photo, I chose "Blue Dragon Books" located at the foot of the Blue Mountains. Diane is the owner, and Blue Dragon has been in Glenbrook for about 4 years, it's tucked in a little arcade and you know the doors are open by the big trolley full of books stacked by the door. I've been in a few second hand bookshops over the years and I have to say that Blue Dragon is well laid out, beautifully stocked and well lit. You can also read a great review for it here.

I set up my little corner, and tried to visualise what I wanted the final image to look like. By the way, I think this is really important  - to be able to visualise what it is you're trying to create. In my case, if I didn't do this, I think I'd still be sitting, pondering in the Blue Dragon, working out how to shoot "books".... anyway, while I was setting up, customers came and went and chatted with Diane about various titles and the merits of reading. What a great way to spend the day!

The book I'm holding up, and weighs a tonne, is titled "Faces - A Narrative History of the Portrait in Photography" by Ben Maddow. What a serendipitous find! I had asked Diane if she could think of any large book she may have in stock that would have a woman's face on the cover - and she came up with this. Not only is it perfect for the shot, but I now own it, as it's just what I had been looking for. The original owner of the book was Colleen, and her parents had given it to her for Christmas back in 1982. I'm sure she pored over the pages in the same way I am.

Camera details for the shot - I used the nifty fifty lens with the 430 exII flash mounted and bounced on the ceiling. f5.6 and iso200.

Friday, 27 July 2012

Week 30 ~ Something Funny

 Week 30 ~ Something Funny

Indeed. Something funny is definitely going on in the reality TV and modelling world. Why, you ask? Well, it seems that no one, but no one is willing to give the talented and gorgeous Ivana B. Downwright-Glamma a chance. She has sent out millions and millions of copies of her head shots to ALL of the agencies and to ALL of the reality TV production houses around the world (yes; yes she has...) and has not received one single reply. No. Not one. And I think you can see from her portrait shots I've included here, each image is a winner. To be honest, I don't understand it. I've seen a smattering of reality TV. I've seen the adverts for the Kardashians, for Jersey Shore, for that Essex mob and I've even seen tweets about The Shire, and Ivana B. can offer so much more. Viewing tastes have changed, they are less sophisticated than they once were. Perhaps that is the problem. Perhaps Ivana B.'s days of being in the spotlight were over before they even began. Not all is lost though, she is still a favourite at the Doomsbury Retirement Home for the Photogenically Challenged where she gives up her time sharing hair and make-up techniques with those who lack the skills and finesse that she so clearly has by the bucket-load. *

* Ummm...none of this is one little bit true.

Friday, 6 July 2012

Week 27 ~ Black and White

Week 27 ~ Black & White 

 A few weeks ago I ordered a book on the photography of Berenice Abbott and it arrived earlier this week. I'm looking forward to reading more about her, her story and to learn a little more about her photography, style and influences. So this week, I was inspired by her style of no-nonsense portraits and have tried to channel her in creating this self-portrait.

I look at some of her portraits and I'm left with lots of questions - why has she posed that person to gaze out of the frame, and this one instead to glare directly at the camera; many of the poses seem uncomfortable rather than relaxed, they are unusually cropped, and unconventional, so it leaves you with a feeling of tension - hence the questions. I hope that I have conveyed some of this tension with my example this week, and I thought it fitting that the theme this week should be Black and White.

Now, you would never know that the hat I am wearing - a gift from a dear friend - doesn't match the colour of the coat. Tee hee! Black and White photography is very forgiving of mismatched colours.

And in other news this week, one of my images was featured in the new Photographers Connection website Blog! Yeh!

Monday, 19 March 2012

Week 10 ~ A Faceless Self-Portrait

Still Life with the Faceless Woman

I'm running behind with my posting, as this is already week 12... Week 10's theme was "a faceless self-portrait" and I really did take it quite literally.  The image is made up of 3 separate images: the flowers in vase image, one of me sitting in a chair and one of the decorative paper. All images were then composited in PS where several more texture layers and a border were added. I was really happy with the final result, as I don't do a lot of this sort of compositing. It's always a buzz when the image in my head matches the result on the screen. As an added buzz, the group on Facebook that I follow and who is running this Project52, Photographer's Connection, chose my portrait for their image of the week - you have to be pleased with that!
Image used as cover image for the group!

The image is available as a greeting card, canvas, mounted print, poster, or framed print over at Red Bubble.

Saturday, 7 January 2012

A New Year - a New Project

 
Well, well - Happy New Year! Did you make a New Year's resolution? No, neither did I. I only get disappointed when after a few days I abandon the resolution, so it's easiest not to even make one! I have embarked on a new photographic project though - and I can't tell you how pleased the family is about this! I've told them that it won't be as tough as Project365; this one only requires 52 photos - that's easy, right?
So with one day to go before the first deadline, I set about completing the task for week 1. Of course week 1 would be "self-portrait" but I decided to combine an idea for another challenge and create one photo. Some might say that's being lazy, I prefer to think of it as creative! The other challenge's brief was two-fold - "A new beginning" plus "texture".  So with those criteria in mind, I set about capturing the image. Setting up the lights and umbrellas, positioning the camera, taking test shots, then hair and make-up and then at the last minute I decided to change the lens. I swapped the nifty-fifty to the Lensbaby Composer which meant I had to grab a prop to sit where I would be sitting and find the focus spot.  After quite a few attempts and some fine tuning of the lens, I managed to get my eyes tack sharp, which was my aim. I then scoured through my 50's magazines to find an appropriate kitchen shot, in colour - it's wasn't common for magazines to be in full colour then; scanned the image into PS and incorporated that into my photo. I played with the individual curve layers to create a discoloured and retro look, before then scanning in some old and textured paper. I find that scanning rather than photographing the paper yields better results, as you can really bump up the dpi quite a bit. I used 3 of my old papers and applied them in soft light, overlay and multiply at varying opacities. I then added a couple of text layers and added the text, using retro fonts in keeping with the retro theme. Lastly, I felt it still needed a little something so I drew the retro starbursts and created some vignetting. From start to finish it probably took about 4 hours and I probably would have kept fiddling with it, but when you're working to a deadline, there comes a point where you need to stop.
I'll keep you up to date with each week, posting the image and blurb here, as well as posting the image over on Flickr. If you've started a Project52, link to it here, I'd love to follow your progress - and maybe I can link you in the side bar. The best part about the Project52 I'm following is the fact the weekly theme is spelled out for us - yeh! So, here's to 2012 - may you enjoy many creative moments and may you be surrounded by those you love.

Friday, 30 October 2009

Tips on How to Shoot Self-Portraits (or not)

The following tips, hints and how-to's are in no way to be viewed as being completely instructional, or even helpful... I just thought I'd clarify before you read any further. Anyway, let's begin to take a look at what's involved in taking Self-Portraits.


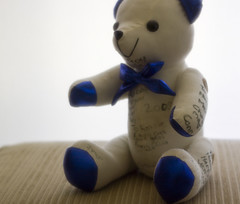
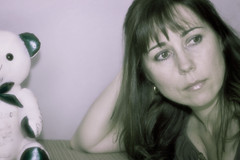
1. It's a good idea to use a prop, such as this teddy bear, as a point of focus - the aim is to replace the prop with yourself, of course.


2. If you have one, use a remote shutter release - they are really handy, as you don't have to rush back to the spot within 10 seconds (like I had to before I bought the shutter release) - oh, it's also a good idea to remember where the spot was, and to hide the remote from view...


3. If you're a little shy, then get a family member to join you in your Self-Portrait, especially when they also don't normally like having their photo taken. Then the two of you can learn to relax and go with the flow. Note: sitting with the reluctant family member and using a remote shutter is a stroke of genius that I wish I had thought of way before now.


4. The reluctant family member, who is by now enjoying this little photoshoot, may even pose and smile at just the right time. No, wait, this shoot is about taking Self-Portraits...sorry, but I couldn't resist adding this photo or this quite useless tip.


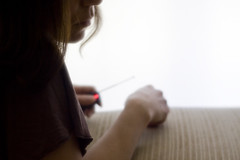
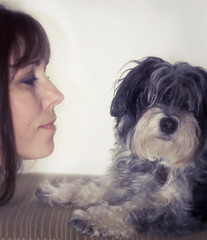
5. Taking a Self-Portrait doesn't always mean facing the camera. Have you thought of a profile pose?


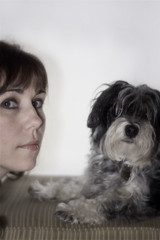
6. If you're not happy with a profile shot, there's always the stand-by "look-at-the-camera-with-a-semi-serious-expression", but don't be shy, fill the frame, don't hang around the edges....


7. Yes, while this is a Self-Portrait shoot, it's also good manners not to hog the camera and push the family member out of the way. There is room for both of you.


8. Placing yourself, or your subject in this case, in the centre of the frame isn't necessarily the wisest choice. Sometimes this can make for a very static and boring composition. Place yourself, or your subject to the side, leaving some negative space for the eyes to rest on.


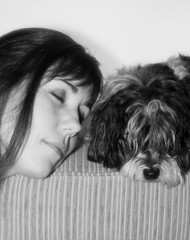
9. Who said your eyes need to be open when you're taking a Self-Portrait? Who said you even need to be awake when you're taking a Self-Portrait? These are questions you should ask yourself.


10. When using a prop as a focusing tool, it's a good idea to remove it completely from the shooting area. Unless of course you want to incorporate it in your Self-Portrait. In that case, it can make for a quirky element in your shot. Mind you, you can also crop the image, or clone it out.


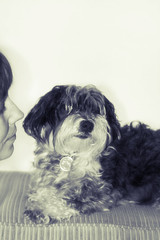
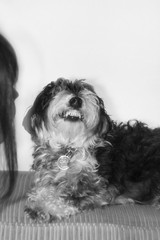
11. If you're sharing your Self-Portrait with a family member, you don't need to have both of you in focus. In fact, it looks quite nice if only one of you is in focus, and the other is all soft and blurry. Using a shallow depth of field will mean the eye will be drawn to the part of the image in focus, in this case, the precious family member.


12. Use a Soft Focus, Cross-Screen or even Rainbow filter to give a soft and dreamy feel to your Self-Portrait. Using such a filter makes for a very forgiving image result.


13. A little bored with straight photography? Then why not incorporate some texture layers to add some interest and depth to your Self-Portrait. Either download these from around the web, or photograph your own, as I've done here. The number of layers and how you blend them will depend on what you're trying to achieve with your Self-Portrait.


I used my diffuser propped against a fairly bright window, camera on a tripod and a 50mm F1.8 lens. The 50mm is known as the "portrait lens" and the fact that it's only the f1.8 means it's called the "plastic fantastic". I also used a speedlite flash (just a teensy one) with a tissue as a diffuser to soften the effects of the flash.

If you haven't tried taking your Self-Portrait, give it a go, you might be surprised at just how much fun it can be. If you have taken your Self-Portrait, and can share some useful tips, feel free to comment in this blog - share your tips with others.

Red Bubble Gallery

Red Bubble Gallery
view my photography at Red Bubble