Showing posts with label tutorial. Show all posts

Thursday, 23 February 2012

Can You Make Large Canvas Prints With Your iPhone Images?


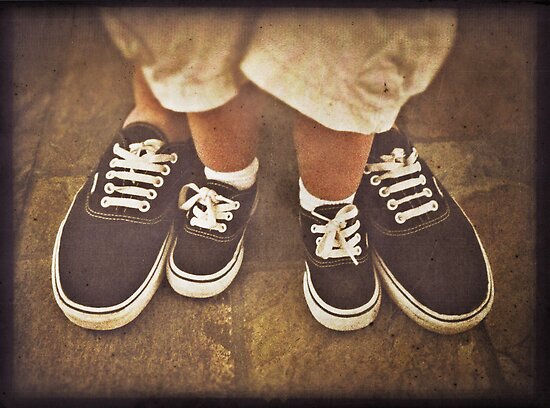
In short, the answer is yes. But you do need to follow a few steps in order to be able to obtain large prints. Below are the steps I used to create a canvas print as large as 684mm x 508mm of the above image.

You will need:

* iPhone image
* gloss photo paper
* inkjet printer and scanner
* photo editing software

Method:

1. Open up your photo editing software and import your iPhone image.
2. If you're using PS, select File > Print. This will open up the image and position it on the "paper". I selected A4 sized paper and then set the size so the image would fit within that A4 paper.
3. Go into your Printer Properties and select gloss paper and the highest quality printer setting you can. In the case of my printer, I also made sure the actual printer also had those settings. (probably an unnecessary step)
4. Once you have printed the iPhone image onto your gloss photo paper, pop that image onto the scanner.
5. Go to your photo editing software program and select File > Import. You'll see that you have your printer as one of the options. Select it.
6. Select Advance Mode in the scanning tabs. You should be able to see that you can now select the Output Resolution. You will want to increase this to as high as you can. The above image was scanned at 500dpi, giving me a file size of 68MB. I can scan images on my printer to a maximum of 99MB.
7. There are other settings you can fiddle with, such as Data Size and Image Settings. Other than making sure the Image Setting is "Photo", I don't fiddle with any of the other options. I then select Preview, and this does an initial scan.
8. If you're happy with the Preview Scan, then hit the Scan button and the image will then be carefully scanned and popped into your photo editing software program.
9. Once your scanned iPhone image is done, this is where you can make any further edits, changes, add textures and so on.

The above image had already been edited using a couple of iPhone apps and once it was scanned, I simply added a couple of my textures, tweaked the vibrancy and curves and then I was done. I'm sure there are other ways this can be done, but I thought I'd share how I do it.

I hope this has been helpful - and have fun scanning those iPhone images :)


Monday, 28 June 2010

How to Add Texture to Your Photographs - a simple tutorial

I’m always asked how I add textures to my images, so I thought I would write a quick and simple recipe for you with a before and after photographic example. I use my own textures, however in this example I have downloaded some free textures from Isabelle LaFrance Photography.  Isabelle has free textures as well as free actions on her blog, so go and pay her a visit.


Here is the image BEFORE:


Step 1: Download the Free Texture Pack from Isabelle’s Website and save them onto your computer.

Step 2: Open up your Photograph. I’m using Photoshop, but I’m sure you can adapt these instructions to suit Elements.

Step 3: Open up “Burst – Free” texture that you’ve downloaded and change the colours using “Colour Balance”. I altered the colour from the original terracotta/green to a blue/fuchsia.

Step 4: Add the “Burst-Free” layer to your image. (Right click on the layers dialogue box and select “Duplicate” and select the image destination you would like the texture image to be sent to).

Step 5: Go back to your original image. It should now have the “Burst – Free” layer over the top. Resize if necessary. Set this layer to “Soft Light” and to about 63% Opacity.

Step 6: Open up “Organic – Free” texture and once again change the colours to suit. I altered the colour from the original mushroom to a turquoise.

Step 7: Add the “Organic – Free” layer to your image. Resize if necessary and set the layer to “Soft Light at about 60% Opacity.

Step 8: Duplicate the Original image and position this on top of the two textured layers.  Change this layer to “Black & White” (Go to Image – Adjustment – Black & White) and set this layer to “Soft Light” at 100% Opacity.

Step 9: Open a Curves layer mask and create a very slight S-curve – to suit your taste.  And you’re done!

Step 10: If you are posting the image up on the web, and you’ve used other people’s images – then don’t forget to give credit with links back to their site.


Here is the image AFTER:
beauty is a fragile gift

Please Note: The “recipe” will alter with each and every image as well as each texture layer you apply.  While setting it to about 60% Soft Light works in this example, in another example, Overlay at 20% may be the effect you’re after.  The trick is to experiment; there is no right or wrong way to apply layers. Of all the layer effects, I tend to use Soft Light, Overlay, Hard Light, Multiply and Darken the most.

If you have any questions, then please leave a comment and I will try and answer it for you.  In the meantime - Enjoy! :-)


Red Bubble Gallery

Red Bubble Gallery
view my photography at Red Bubble