Showing posts with label how-to. Show all posts

Monday, 14 January 2013

How to Watermark your Images

It's about this time of year that I consider updating the watermark I use when I add images to sites such as Flickr. The trouble with this is that I can never seem to remember how I did the previous one... Add to that, I've also been asked by a couple of friends to show them how to add watermarks to their images, so I thought I'd write a step-by-step of how I created this current watermark.


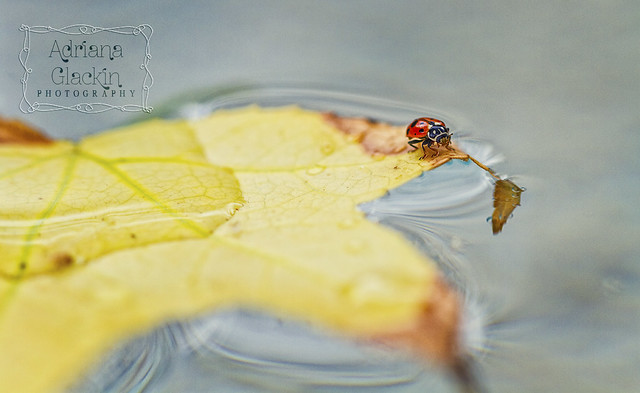
ladybird I 

1. Choose a font, any font, preferably one you like and that can be a sort of signature for you. No doubt you have hundreds of fonts on your computer, so open up a document, type your name (or whatever text you want to use for your watermark) and have a play with the fonts you already have. If you're not happy you have The Font, then turn to the internet - that's what it's there for! I found this font from dafont and it's called znikomit No24 by gluk. The swirly frame was one I had made and used for a previous project, but you don't need to use a frame for your watermark.

2. I use PS but I'm sure that any photo editing software can be used. (These instructions will be PS oriented.) Open up a new file to a size of 4300 x 2300, set layer to white. But to be honest, the size can be approximate, as you'll re-size the watermark down to size according to each image you watermark.

3. Select the text symbol and then select a text colour. I've chosen #a6a6a6 for mine. Type your name on that layer.


4. Go to your Layers menu and select Blending Options. Because the font I have chosen is quite fine, I've selected Bevel and Emboss as well as Drop Shadow. Depending on the font you choose, you may find this step unnecessary. I have also selected Colour overlay and set it to negative image.
 

You can see the effect of the blending options on a heavier font:


5. I added my swirl frame on a new layer and inversed the colours (it was black, inversed to white) then applied the same blending option as above:


At this stage, it's still too 'dainty' and almost invisible on even the plainest of images. This won't be the case if the font you have chosen is bulkier. If you have chosen a dainty font and/or frame, simply duplicate both the text and frame 2 or even 3 times. Practice popping the watermark on one of your images to see if you're happy with the effect. You may find that you don't need to duplicate the blending effect on each duplicated layer, so simply disable the blending option as you see fit.

6. Once you're happy with the watermark, it's time to group all the layers together using the "Create a new Group" option in the Layers palette (red circle). Drag each layer onto the new folder (green circle). You will notice the Blending Mode is now "Pass through". Save this as a .pdf file:


7. Time to grab one of your images and test out your new watermark. Grab your folder, you'll notice I've called mine "ZNIKO grey" and copy that to one of your open images. How you size the watermark, where you position it and how you blend it to your photo will depend on each image and of course your own personal preference:


So now you should be good to go. I hope you've found this How To easy to follow and implement..

What are your thought on watermarks? Do you use them?  If not, I'd love to hear why. 
 
If you have any questions, drop me a comment.

Friday, 2 March 2012

How to Add the "No Pin" Code to Blogger Site


I've been feeling more and more uncomfortable about the whole Pinterest thing and not only have I removed all the pins from my Pinterest account (except for one), I have also revoked my sharing permissions on Flickr and now on Blogger. This really is such a shame, as I really like the concept of being about to catalogue images and snippets into various categories for further reference purposes, but not at the risk of serious copyright breach. So, if you're feeling uncomfortable with Pinterest's TOS, then you can add a piece of code to your Blogger site that prevents others from pinning your images without your permission.

 This is how:


1. Go to Template > Edit HTML
2. Select "Proceed"

3. Tick "Expand Widget Templates"

4. Now look for the following piece of code < /head > (actual code won't have a space between symbols and letters)

5. Paste in the following code just before the < arrow in the code:

< meta content='nopin' name='pinterest'/ > (remove the space between the < and > keys)


6. Select "Preview" to make sure it's not broken then "Save".

Now if someone tried to pin an image from your Blogger site, the following message shows:

This site doesn't allow pinning to Pinterest. Please contact the owner with any questions. Thanks for visiting!

While this is only a bandaid solution, I hope that Pinterest will look at their very unclear, unfair and contradictory TOS.

Update: It appears that Pinterest have updated their TOS but they are still to alter their TOS enough to answer the copyright concerns of many.


Thursday, 23 February 2012

Can You Make Large Canvas Prints With Your iPhone Images?


In short, the answer is yes. But you do need to follow a few steps in order to be able to obtain large prints. Below are the steps I used to create a canvas print as large as 684mm x 508mm of the above image.

You will need:

* iPhone image
* gloss photo paper
* inkjet printer and scanner
* photo editing software

Method:

1. Open up your photo editing software and import your iPhone image.
2. If you're using PS, select File > Print. This will open up the image and position it on the "paper". I selected A4 sized paper and then set the size so the image would fit within that A4 paper.
3. Go into your Printer Properties and select gloss paper and the highest quality printer setting you can. In the case of my printer, I also made sure the actual printer also had those settings. (probably an unnecessary step)
4. Once you have printed the iPhone image onto your gloss photo paper, pop that image onto the scanner.
5. Go to your photo editing software program and select File > Import. You'll see that you have your printer as one of the options. Select it.
6. Select Advance Mode in the scanning tabs. You should be able to see that you can now select the Output Resolution. You will want to increase this to as high as you can. The above image was scanned at 500dpi, giving me a file size of 68MB. I can scan images on my printer to a maximum of 99MB.
7. There are other settings you can fiddle with, such as Data Size and Image Settings. Other than making sure the Image Setting is "Photo", I don't fiddle with any of the other options. I then select Preview, and this does an initial scan.
8. If you're happy with the Preview Scan, then hit the Scan button and the image will then be carefully scanned and popped into your photo editing software program.
9. Once your scanned iPhone image is done, this is where you can make any further edits, changes, add textures and so on.

The above image had already been edited using a couple of iPhone apps and once it was scanned, I simply added a couple of my textures, tweaked the vibrancy and curves and then I was done. I'm sure there are other ways this can be done, but I thought I'd share how I do it.

I hope this has been helpful - and have fun scanning those iPhone images :)


Monday, 28 June 2010

How to Add Texture to Your Photographs - a simple tutorial

I’m always asked how I add textures to my images, so I thought I would write a quick and simple recipe for you with a before and after photographic example. I use my own textures, however in this example I have downloaded some free textures from Isabelle LaFrance Photography.  Isabelle has free textures as well as free actions on her blog, so go and pay her a visit.


Here is the image BEFORE:


Step 1: Download the Free Texture Pack from Isabelle’s Website and save them onto your computer.

Step 2: Open up your Photograph. I’m using Photoshop, but I’m sure you can adapt these instructions to suit Elements.

Step 3: Open up “Burst – Free” texture that you’ve downloaded and change the colours using “Colour Balance”. I altered the colour from the original terracotta/green to a blue/fuchsia.

Step 4: Add the “Burst-Free” layer to your image. (Right click on the layers dialogue box and select “Duplicate” and select the image destination you would like the texture image to be sent to).

Step 5: Go back to your original image. It should now have the “Burst – Free” layer over the top. Resize if necessary. Set this layer to “Soft Light” and to about 63% Opacity.

Step 6: Open up “Organic – Free” texture and once again change the colours to suit. I altered the colour from the original mushroom to a turquoise.

Step 7: Add the “Organic – Free” layer to your image. Resize if necessary and set the layer to “Soft Light at about 60% Opacity.

Step 8: Duplicate the Original image and position this on top of the two textured layers.  Change this layer to “Black & White” (Go to Image – Adjustment – Black & White) and set this layer to “Soft Light” at 100% Opacity.

Step 9: Open a Curves layer mask and create a very slight S-curve – to suit your taste.  And you’re done!

Step 10: If you are posting the image up on the web, and you’ve used other people’s images – then don’t forget to give credit with links back to their site.


Here is the image AFTER:
beauty is a fragile gift

Please Note: The “recipe” will alter with each and every image as well as each texture layer you apply.  While setting it to about 60% Soft Light works in this example, in another example, Overlay at 20% may be the effect you’re after.  The trick is to experiment; there is no right or wrong way to apply layers. Of all the layer effects, I tend to use Soft Light, Overlay, Hard Light, Multiply and Darken the most.

If you have any questions, then please leave a comment and I will try and answer it for you.  In the meantime - Enjoy! :-)


Red Bubble Gallery

Red Bubble Gallery
view my photography at Red Bubble