Showing posts with label iPhoneography. Show all posts

Friday, 17 May 2013

Chocolate Lava Cupcakes

I dub thee 'lava cupcake' #food #glutenfree
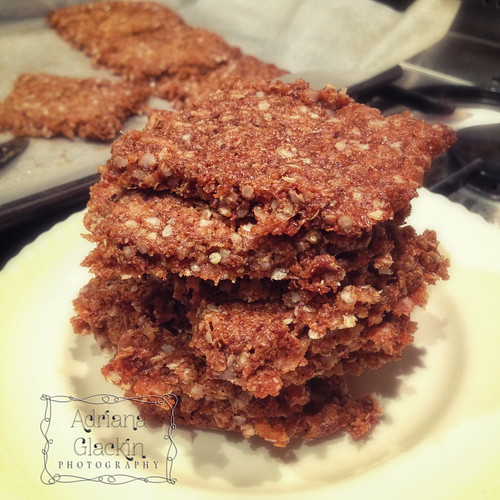
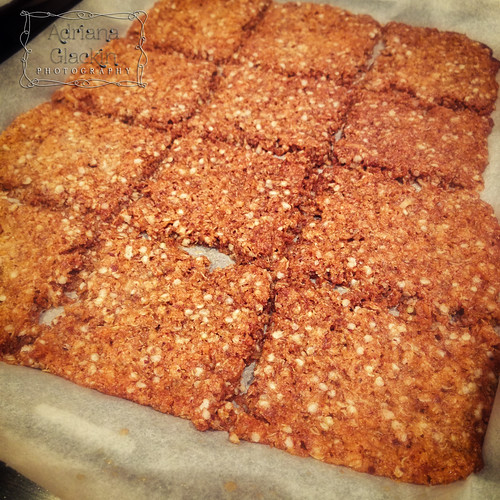
One of the holiday batches of Chocolate Lava Cupcakes

A few weeks ago while away on holidays, I took advantage of not only being in holiday mode, but also being in a new kitchen, new oven, fairly bare cupboards and did I mention that I was in holiday mode? As there are about 20 families we go away with, we try and organise a Ladies' Afternoon where wine and nibblies are consumed, with no husbands or children in sight. And that is where this recipe was born. I had limited supplies and a couple of my friends have special dietary requirements, so I wanted to make sure the recipe would be safe for them to enjoy. I managed to make a few batches while away and before you ask - who bakes while they're on holidays - you'll see from the recipe how simple it is to whip up. No fancy gadgets required!

So where did the name Chocolate Lava Cupcakes come from? One of the hundreds of kids that belong to one of the 20 families asked if he could have a cupcake - in a most polite and sweet way, and I simply couldn't refuse such sweetness! While enjoying the cupcake he told his mum he thought the inside was like lava - all molten and gooey and delish! The name was perfect and they've been known as Chocolate Lava Cupcakes ever since. So, thank you to T.'s young son for naming these cupcakes, I couldn't have given them a better name!

There are a few variations to the recipe and I'll include those details in the notes.

Chocolate Lava Cupcakes


Ingredients:


2 1/4 cups almond meal
3 - 4 tbs cocoa powder, unsweetened
generous handful of dark chocolate buttons
1/4 cup coconut oil
3 generous tbs of glucose
1 cup mashed pumpkin
2 eggs
1 tsp baking soda, gluten free

The dry ingredients laid out

Method:


* Preheat oven to 160°
* Place all the dry ingredients into a bowl and mix together with a wooden spoon.
* Add the eggs, mashed pumpkin, glucose and melted coconut oil.
* Stir with a wooden spoon until combined.
* Place the batter into cupcakes and bake for about 15-20minutes. It will depend on size of cupcake wrappers and your oven, of course.

Adding the wet ingredients to the dry mixture

The batter's ready to be placed into waiting cupcake wrappers

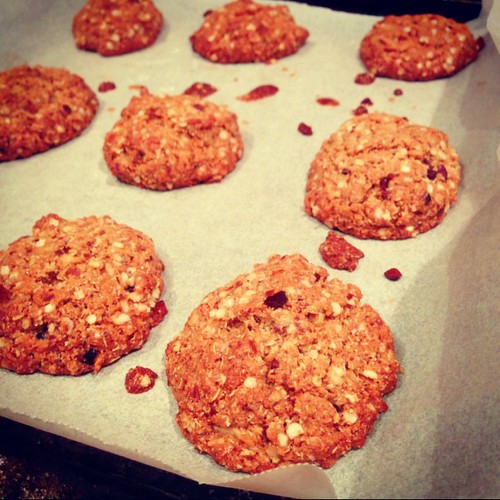
Fresh from the oven. this batch made 8 large cupcakes

I allowed the cupcakes to cool before whipping them straight into the freezer

Additional Notes:


* If you don't want to use mashed pumpkin, you can use a cup of pureed apple instead. If you're using apple puree, then ease up on the glucose or it may be too sweet for you. For a wholesome Red Velvet Chocolate cupcake, add a cup of raw finely grated beetroot.
* You can substitute Honey or Rice Malt Syrup if you don't have Glucose. Some may find the recipe not sweet enough, especially if they're used to eating store bought or traditional cupcakes, so you might need to add more sweetness. You could also use Stevia, I tend not to use a lot of that as I don't like the taste of it.
* When you're testing for readiness of the cupcakes, you want the skewer to be a bit dirty, but not wet. In other words,you want to under-do them to get that lovely moist "lava" quality.
* Feel free to add things like vanilla or your favourite nuts or even date chunks. Remember, I had limited items at the time.
* If you want an egg-free version, then use 2 tbs of chia seeds to 1/2 cup of water. Stir the seeds and water and wait for the seeds to expand, forming a jelly-like goo. This can then be substituted for the 2 eggs.
* The measurements I've included are approximate and even when I make batches of the cupcakes now, I play around with the quantities.
* This recipe is Gluten-Free and Paleo-friendly.

I hope you enjoy this recipe and if you have any questions or suggestions then feel free to post a comment.


Wednesday, 8 May 2013

Quick, Easy and Healthy Banana Pancakes

A few weeks ago my friend C. told me of a very quick and easy banana pancake recipe and I had all but forgotten about it until this morning when I spied the bananas in the fruit bowl. I don't know if your household is the same, but bananas in my household are either immediately scoffed and you question whether you actually bought them in the first place, or they're completely ignored and then the only thing they're good for is for baking into banana cake/bread/muffins.

Back to the quick, easy and healthy recipe - and this is yummy enough to be served up as an afternoon snack and dare I say it, even dessert!

Quick, Easy, Healthy Banana Pancakes

What you'll need:

1 banana, mashed with a fork
1 egg
Sprinkling of cinnamon powder

1 sandwich press
3 egg rings that you've greased with a little bit of butter.

* This is enough for one serving. You can alternate the egg/banana ratio depending on how many bananas your family has left you, and how many people you need to make this for. I waited for the family to head to work, school and uni before making this - sneaky, I know ;)


I really should have cleaned the sandwich press, or at least photoshopped the crumbs away...


Method:


Preheat your sandwich press. Mine doesn't have a temperature control dial so it's either off or on. Place the 3 greased egg rings on the sandwich press. In a small bowl, add the egg to the mashed banana and keep mooshing together until a nice gloopy consistency is created. Sprinkle some cinnamon powder to taste. Pour the mixture into the egg rings and close the lid. It only takes a few minutes to cook, so while you're waiting, you can slice up some seasonal fruit or raid the pantry for nuts. Grab a plate, test the pancakes to make sure they're cooked (I did this by cutting into one of them). Run a butter knife along the edges of the egg ring in order to release the pancake. Stack the pancakes on your plate, add a dollop of ricotta and the seasonal fruit, then finish off with another sprinkling of cinnamon. Sit down and enjoy it!

Delicious breakfast for one. Nom!

Alternatives:

* Omit the ricotta if you don't eat dairy, use a dollop of tahini instead.
* If you prefer your food a little sweeter (note that I didn't add any sweeteners natural or otherwise), then add a squirt of honey or your favourite sweetener to the eggy mixture.
* To turn this into a simple dessert, add a handful of dark chocolate bits to the eggy mixture, then serve the lot with ice cream or sorbet or yoghurt.

There would be countless alternatives to this simple recipe. Best of all, it's quick, you don't need any high falutin' appliances and the resulting dish is delicious, wholesome and versatile. Give me this delicious breakfast to the alternative breakfast that's served up from a cardboard box any day!

Thanks so much C. for the great breakfast tip! xx


Monday, 22 April 2013

Anzac Biscuits - Gluten Free

It's been a while. Life has been busy and hectic, in a good way. I thought I'd share this quick recipe with you. The original can be found here. If you're looking for a gluten-free alternative, then the recipe below is my first attempt at making a gluten-free version of this biscuit.

Anzac Biscuits - Gluten-Free

Anzac Biscuits - Gluten-Free

Ingredients:


1 cup Almond Meal
1 cup Quinoa Flakes
1 cup shredded coconut
40g Butter *
85g Coconut Oil *
1/2 cup Coconut Palm Sugar
2 tbs Golden Syrup
1 tsp Bicarb Soda

Method:


The method follows the original recipe I have linked above, which is:

- Preheat oven to 160°C and line 2 trays with baking paper.
- Mix the almond meal, quinoa flakes, shredded coconut and bicarb soda together in a mixing bowl.
- Melt the butter, coconut oil, golden syrup and the coconut palm sugar in a pan. It will look like a brown thick-ish splodgy mess, but that's ok.
- Pour the melted mixture into dry mixture and stir with wooden spoon.
- Now, by this stage I stopped referring to the rest of the original Method and basically threw a spoonful of mixture onto the trays, so that when the whole thing was done - in 10 minutes - it was one ginormous Anzac biscuit! All was not lost, as I used a knife to separate the still warm biscuits and then waited for them to cool before calling the Official New Recipe Tasters, that is, the Family.
Anzac Biscuits - Gluten-Free
The raw biscuits are definitely not 5cm apart...And that's why it's important to read ALL the instructions...
Anzac Biscuits - Gluten-Free
One ginormous Anzac Biscuit for one, or 12 good size biscuits to share...your choice ;)
Freshly baked gluten-free Anzac Biscuits. A lot nicer looking than first batch! #food
EDIT: Batch No. 2, freshly baked. No butter, just coconut oil and a tablespoon of coconut flour

The Verdict? 

"You are making more of these, aren't you?", "Can I have another one?", "These are so nice, can you make more?"

* Note: I wanted to use a blend of both butter and coconut oil and the only reason for the 40:85 blend was that was all the butter I had in the fridge. If you're avoiding dairy, then you should be able to omit the butter and use coconut oil instead. I will try that version and post the results as an edit to this post.

These biscuits are super easy to make, take 10 minutes to bake and they're totally yummy. What's your favourite version of the Anzac biscuit? I'd love to hear your variations on this classic biscuit.

Happy baking :)

Friday, 25 January 2013

iPhoneography Book from Blurb

Late last year I put together a collection of some of my favourite iPhone images in a book over at Blurb. There was a promotion at the time, so I chose images that made me smile and reminded me of the place or occasion, and using Blurb's template, hey presto! a mini book was created. I ordered said mini book and was chuffed with the quality and the rendition of my images. Yeh!

Here's a selection for you to look at:

A day in the country III
The skies are just so big in the country, making the landscape so small.

Another gorgeous day in the BM's. This was taken a few days ago on first sunny day.
I love taking friends from afar here and see the looks on their faces when they first spot this gorgeous view

On a chilly night I dream of paradise.
Although I managed to get lost on this circuit trail (!), it didn't bother me with a view like this to distract me


The Gong #summerherald
I will always look at this view and think fondly of you ~ how we all miss you ♥

Here's the Deal:


Head over to Blurb and take a look at the book, you can preview about 15 of the 60 pages. If you like the sample enough, click on add to cart. And this is where you'll be helping me out. My earnings from each book is set to $5.00 and I'm going to pledge each $5.00 earned from each book sold to my Ride to Conquer Cancer that is happening later this year.


Who is this book perfect for?


* Those in a hurry to get through a book and say, "Yeh, I finished a book in a day". (There are NO words in the book! That's a bonus right there!)
* Those who are into iPhoneography and dig the faux-retro feel you can apply to images using the various apps rendering the world an arty-farty wonderous place.
* Those who hate iPhoneography and belong to "I Hate iPhoneography" clubs. They could take my book along to one of their meetings and make it a point of discussion.
* Those that live in Australia and love this wide brown land of ours and can't get enough of seeing images from all it's parts.
* Those that can't wait to save their pennies and visit this wide brown land of ours - this book contains a teeny little fraction of what they can expect to see when they visit.
* Those creative writers who look for inspiration in images - there's plenty of white space around the images for you to jot some notes down for your next plot.
* Those who love online shopping and getting parcels delivered to their door while wearing pj's and slippers. They could buy it for themselves, or even a loved one (notice the ♥ shaped tree on the front cover!!)How perfect would this be as a gift!
* Those that are starting out in photography and want to use their iPhone as a practice tool - this book may help them to see the world around them with new eyes.
* Those who have had a family member or friend affected by cancer and who don't mind forking out about A$26.95 of which $5.00 goes to Ride to Conquer Cancer. The book can be a sort of super fancy receipt of their donation.
* Those that have been lucky enough not to have any friends or family affected by cancer and see the A$26.95 (with the $5.00 going to Ride to Conquer Cancer) as a testament to their lucky break they have been spared the anguish, stress and world-will-never-be-the-same-again feeling that comes with a cancer diagnosis.
* Those that are just plain nice and aren't necessarily into iPhoneography, but have a spare A$26.95 of which $5.00 goes to Ride to Conquer Cancer, and don't mind helping out a gal with her goal, whilst helping others along the way.

If I've left any other types of people who you think would love to buy this book, then drop me a line and I'll add them to the list.

 What's that? What else can you do? Well, I'd love it if you shared, tweeted, facebooked, google+, tumblered, stumbled, and basically shared the shit out of this post! I would love to be able to write a future post letting you know just how many $5.00 donations were transferred from the Blurb account to the Ride to Conquer Cancer fund.


Wednesday, 2 January 2013

Happy New Year! Especially to you, Overzealous White T-Shirt Hero Dude

Happy New Year! And yes, I also wish the overzealous White T-Shirt Hero Dude a Happy New Year, even if he did almost ruin the start of the year for me and quite a few other people. Against my normally conservative and no-extreme-action disposition, I said yes to going out on a little boat with a few friends on Sydney Harbour for New Year's Eve. Surprisingly, every other person who owns a boat had the exact same idea. Who knew? Aside from the congestion of what must be the Harbour's busiest day, seeing the fireworks from the vantage of the water was really something quite special. So special, I recorded a few clips using my iPhone and edited them and, as you do, popped the finished clip up on youtube:


The atmosphere, the sound, the light spectacular just isn't the same as watching it on the telly even if you do own one of those fancy-dancy tellies. And it's not the same as watching it on the above clip, even if it was shot on an iPhone... Of course at the end of the awesome display - you're not going to believe it - but all the owners of all those boats want to go home or at the very least, be the first one to reach the jetty. And that's where Overzealous White T-Shirt Hero Dude comes into this story. Aside from making bogan comments to those at the start of the queue for taking too long (!), he then proceeded to "help" those boats tied up and waiting for their trailers to arrive. Unfortunately for us,  the trailer for the boat I was on,was parked a million miles away, but that didn't deter Overzealous White T-Shirt Hero Dude from untying the boats, moving them forward and then tying them up again. Very helpful. Now, I don't know boat etiquette, but I would imagine that the person who has their trailer first in line at the jetty should be able to get their boat out of the water first no matter where in the boat queue they are. The trouble was, not only had Overzealous White T-Shirt Hero Dude shifted the boat I was on to the front of the queue, in his overzealousness to help everyone else, he had forgotten to get his trailer which was also parked a million miles away, so off he went to retrieve said trailer. With the only driver of the boat I was on somewhere in the never-ending trailer queue, my friend and I were treated to some pretty colourful language as we were abused for positioning the boat where it was in the way of every boat trying to exit the ramp. The colurful language wasn't anywhere near as pretty as the fireworks either. So, thank you Overzealous White T-Shirt Hero Dude for being the hero you were in "helping" all those of us who weren't fast enough for your liking. You very nearly dampened my New Year's spirit with your overzealousness and heroism and total carry on. Luckily for you, those fireworks were the best damned fireworks ever!

Happy New Year Everyone! Especially Overzealous White T-Shirt Hero Dude - may 2013 be the year you truly help out those in need because I'm sure that deep down you are a really helpful dude. Just not in the early hours of New Year's Day.


Thursday, 23 February 2012

Can You Make Large Canvas Prints With Your iPhone Images?


In short, the answer is yes. But you do need to follow a few steps in order to be able to obtain large prints. Below are the steps I used to create a canvas print as large as 684mm x 508mm of the above image.

You will need:

* iPhone image
* gloss photo paper
* inkjet printer and scanner
* photo editing software

Method:

1. Open up your photo editing software and import your iPhone image.
2. If you're using PS, select File > Print. This will open up the image and position it on the "paper". I selected A4 sized paper and then set the size so the image would fit within that A4 paper.
3. Go into your Printer Properties and select gloss paper and the highest quality printer setting you can. In the case of my printer, I also made sure the actual printer also had those settings. (probably an unnecessary step)
4. Once you have printed the iPhone image onto your gloss photo paper, pop that image onto the scanner.
5. Go to your photo editing software program and select File > Import. You'll see that you have your printer as one of the options. Select it.
6. Select Advance Mode in the scanning tabs. You should be able to see that you can now select the Output Resolution. You will want to increase this to as high as you can. The above image was scanned at 500dpi, giving me a file size of 68MB. I can scan images on my printer to a maximum of 99MB.
7. There are other settings you can fiddle with, such as Data Size and Image Settings. Other than making sure the Image Setting is "Photo", I don't fiddle with any of the other options. I then select Preview, and this does an initial scan.
8. If you're happy with the Preview Scan, then hit the Scan button and the image will then be carefully scanned and popped into your photo editing software program.
9. Once your scanned iPhone image is done, this is where you can make any further edits, changes, add textures and so on.

The above image had already been edited using a couple of iPhone apps and once it was scanned, I simply added a couple of my textures, tweaked the vibrancy and curves and then I was done. I'm sure there are other ways this can be done, but I thought I'd share how I do it.

I hope this has been helpful - and have fun scanning those iPhone images :)


Red Bubble Gallery

Red Bubble Gallery
view my photography at Red Bubble