Thursday, 8 March 2012

Week 9 ~ A Childhood Memory

Week 9 ~ A Childhood Memory ~ so long ago ~


I struggled in the lead up to this theme. What childhood memory to portray and how to portray it? As always, I like to try something new to really push my own creative boundaries. I started by looking through some old family photos, the discoloured 70's variety. Can I suggest, if you have old family photos in those 'magnetic' albums - the slightly sticky backed pages with plastic over-sheet type - to remove your photos before they discolour and become completely stuck to the pages. This is particularly important if there are details written on the backs of the photos; you won't be able to cleanly remove the photos, and not only will you risk not being able to read the notes on the back of the photos, you also risk damaging the photos themselves. The worst thing for your old photos is to leave them in the magnetic albums that were so fashionable during that time, instead here are some suggestions for storing your older photographs.
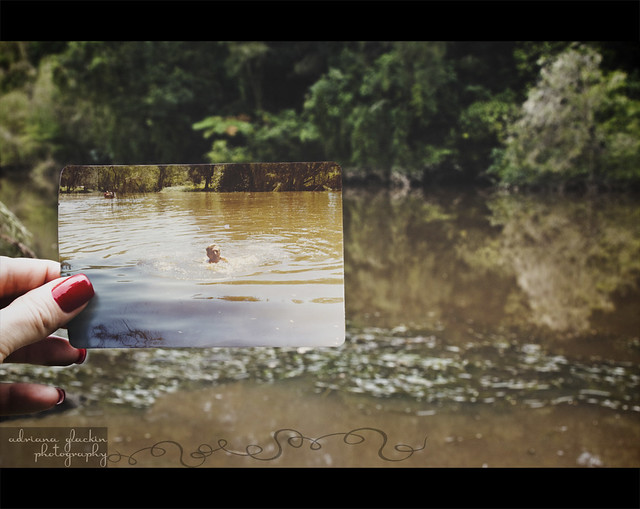
Back to the photo. I have seen the photo held within another photo around the web and I've always liked the concept but never really had an opportunity to try it. So while I was looking through old family photos and looking for inspiration, I came across this photo of my dad swimming in Cattai Creek at Mitchell Park. It had been an age since I'd visited Mitchell Park, so last weekend I headed out there to try and find the spot where this would have been taken. I was a little shocked at the condition of the park. It's terribly overgrown and certainly not the place to go and have a family picnic the way we once did all those years ago. I'm hoping that it's because we've had a ridiculous amount of rain and not because the National Park and Wildlife Services have decided to stop maintaining it altogether.
Back in the 70's, Mitchell Park was a great place to spend the day with family and friends. There were BBQs, trail rides, the creek to swim in, an in-ground pool (my preferred choice), a kiosk, open parkland to kick a ball, and bushwalks. Today, well, there's lots of very tall grass, no pool, no kiosk, and I only saw one picnic shelter. There was only one other couple and they were packing up their kayaks and heading off. I remember Mitchell Park as being a vibrant noisy place, with lots of families enjoying the great outdoors. Last week, was a very different experience. Of course with all the rain experienced in the Hawkesbury region this week, I would imagine that a lot of Mitchell Park would be totally waterlogged.
Re-visiting old memories don't always yield the results you expect. And that of course can be both good and bad.
 
Mitchell Park ~ Impressions 1 Mitchell Park ~ Impressions 2 Mitchell Park ~ Impressions 3
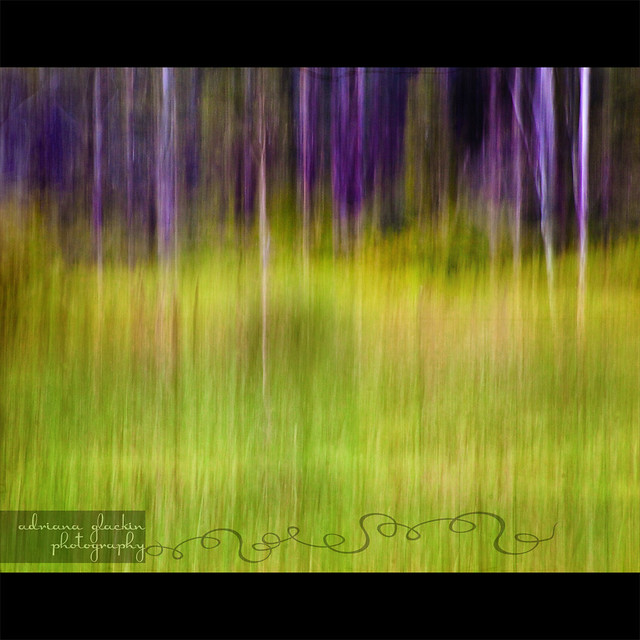
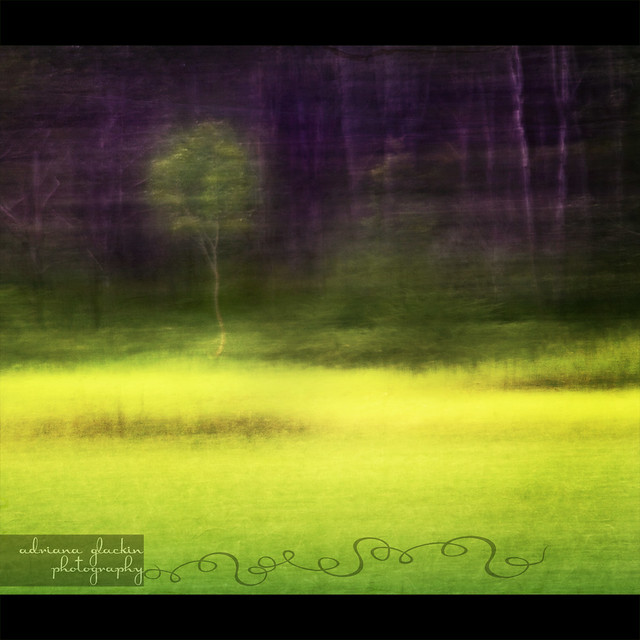
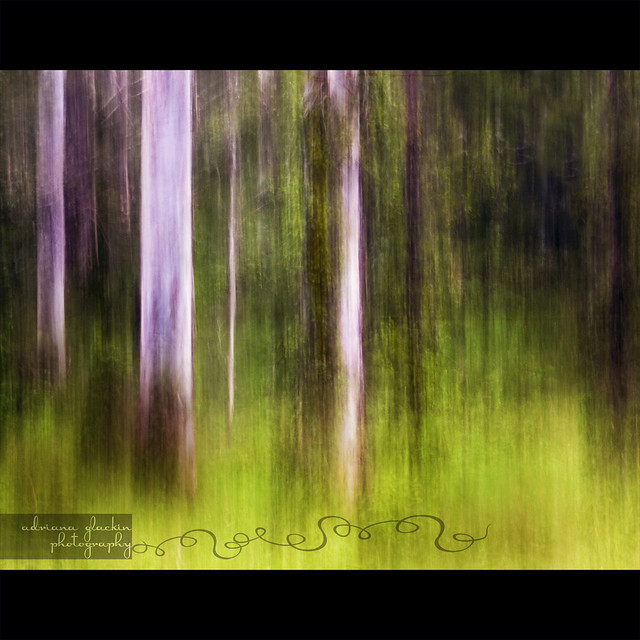
Other images from the day. The effect was achieved in-camera.

Friday, 2 March 2012

How to Add the "No Pin" Code to Blogger Site


I've been feeling more and more uncomfortable about the whole Pinterest thing and not only have I removed all the pins from my Pinterest account (except for one), I have also revoked my sharing permissions on Flickr and now on Blogger. This really is such a shame, as I really like the concept of being about to catalogue images and snippets into various categories for further reference purposes, but not at the risk of serious copyright breach. So, if you're feeling uncomfortable with Pinterest's TOS, then you can add a piece of code to your Blogger site that prevents others from pinning your images without your permission.

 This is how:


1. Go to Template > Edit HTML
2. Select "Proceed"

3. Tick "Expand Widget Templates"

4. Now look for the following piece of code < /head > (actual code won't have a space between symbols and letters)

5. Paste in the following code just before the < arrow in the code:

< meta content='nopin' name='pinterest'/ > (remove the space between the < and > keys)


6. Select "Preview" to make sure it's not broken then "Save".

Now if someone tried to pin an image from your Blogger site, the following message shows:

This site doesn't allow pinning to Pinterest. Please contact the owner with any questions. Thanks for visiting!

While this is only a bandaid solution, I hope that Pinterest will look at their very unclear, unfair and contradictory TOS.

Update: It appears that Pinterest have updated their TOS but they are still to alter their TOS enough to answer the copyright concerns of many.


Tuesday, 28 February 2012

Week 8 ~ A Bad Habit


Week 8 ~ A Bad Habit
Spot the Bad Habit...clue: there are two.

I pondered this topic for hours and in the end I concluded, as any reasonable person would, that I have no bad habits at all. Then I spoke to my family, who were more than happy to point out that I actually had quite a few. Not wanting to bore you with what they may be, I chose the very first offending habit they claim I have. Now, I want you to look at the picture I've attached. What do you see? Do you see a bad habit there? No, I didn't think so. I can't see it either. However, my family would like you to know, there are actually two bad habits contained in that diptych.

And just what are these heinous habits of mine? Well...I apparently leave the little tins of salmon (or tuna) and beans (or corn or chickpeas) on the bench while I eat my lunch and I don't rinse and recycle them immediately. Sometimes I wash them up an hour or so later. Really. How. Bad. Is. That.

And the other bad habit? I photograph my food*. Which, according to them is a bad habit. A very bad habit. Let me just be clear on this, I don't photograph all my food, as that really would be silly. But if you love food as much as I do and also happen to love photography, then when you prepare a dish or are served a dish that is a riot of colour, I get this strong compulsion to photograph it and I simply can't enjoy the dish until I've photographed it. Photographing food, for me, serves another purpose - it reminds me of the event and the people where that food was enjoyed. When you view this set, while it may appear to be just a collection of food and drinks, to me they are memories of great times spent with friends and family in places both near and far. Some people collect teaspoons to remind them of places and events, some have the t-shirt. I photograph the food.  Horrid habit? Maybe. Only maybe.

* Ok, ok, so sometimes I also photograph other people's food before they get a chance to dig in and enjoy it. So what.

Strobist Information:
The blue lines represent the semi-opaque storage box I used as a "lightbox" t diffuse the light.

Canon 50D
50mm f1.8 @f7
ISO 200
1/50 sec
430ex to left of camera shot at 1/2 power and Nissin to right of camera shot at auto.

Thursday, 23 February 2012

Can You Make Large Canvas Prints With Your iPhone Images?


In short, the answer is yes. But you do need to follow a few steps in order to be able to obtain large prints. Below are the steps I used to create a canvas print as large as 684mm x 508mm of the above image.

You will need:

* iPhone image
* gloss photo paper
* inkjet printer and scanner
* photo editing software

Method:

1. Open up your photo editing software and import your iPhone image.
2. If you're using PS, select File > Print. This will open up the image and position it on the "paper". I selected A4 sized paper and then set the size so the image would fit within that A4 paper.
3. Go into your Printer Properties and select gloss paper and the highest quality printer setting you can. In the case of my printer, I also made sure the actual printer also had those settings. (probably an unnecessary step)
4. Once you have printed the iPhone image onto your gloss photo paper, pop that image onto the scanner.
5. Go to your photo editing software program and select File > Import. You'll see that you have your printer as one of the options. Select it.
6. Select Advance Mode in the scanning tabs. You should be able to see that you can now select the Output Resolution. You will want to increase this to as high as you can. The above image was scanned at 500dpi, giving me a file size of 68MB. I can scan images on my printer to a maximum of 99MB.
7. There are other settings you can fiddle with, such as Data Size and Image Settings. Other than making sure the Image Setting is "Photo", I don't fiddle with any of the other options. I then select Preview, and this does an initial scan.
8. If you're happy with the Preview Scan, then hit the Scan button and the image will then be carefully scanned and popped into your photo editing software program.
9. Once your scanned iPhone image is done, this is where you can make any further edits, changes, add textures and so on.

The above image had already been edited using a couple of iPhone apps and once it was scanned, I simply added a couple of my textures, tweaked the vibrancy and curves and then I was done. I'm sure there are other ways this can be done, but I thought I'd share how I do it.

I hope this has been helpful - and have fun scanning those iPhone images :)


Tuesday, 21 February 2012

Healthy Blueberry and Banana Pancakes

 Blueberry and Banana Pancakes

Pancake Tuesday or Shrove Tuesday was today which means there's never been a more perfect excuse to cook up some pancakes. I was surfing the net looking for some ideas, and this particular recipe really stood out - Blueberry and Banana Pancakes by Teresa Cutter, The Healthy Chef. Click on The Healthy Chef to read the recipe for yourself. Not only were the pancakes easy to make,  but they were totally scrumptious! I should have made a double batch...

Red Bubble Gallery

Red Bubble Gallery
view my photography at Red Bubble