Showing posts with label digital photography. Show all posts

Monday, 22 April 2013

Anzac Biscuits - Gluten Free

It's been a while. Life has been busy and hectic, in a good way. I thought I'd share this quick recipe with you. The original can be found here. If you're looking for a gluten-free alternative, then the recipe below is my first attempt at making a gluten-free version of this biscuit.

Anzac Biscuits - Gluten-Free

Anzac Biscuits - Gluten-Free

Ingredients:


1 cup Almond Meal
1 cup Quinoa Flakes
1 cup shredded coconut
40g Butter *
85g Coconut Oil *
1/2 cup Coconut Palm Sugar
2 tbs Golden Syrup
1 tsp Bicarb Soda

Method:


The method follows the original recipe I have linked above, which is:

- Preheat oven to 160°C and line 2 trays with baking paper.
- Mix the almond meal, quinoa flakes, shredded coconut and bicarb soda together in a mixing bowl.
- Melt the butter, coconut oil, golden syrup and the coconut palm sugar in a pan. It will look like a brown thick-ish splodgy mess, but that's ok.
- Pour the melted mixture into dry mixture and stir with wooden spoon.
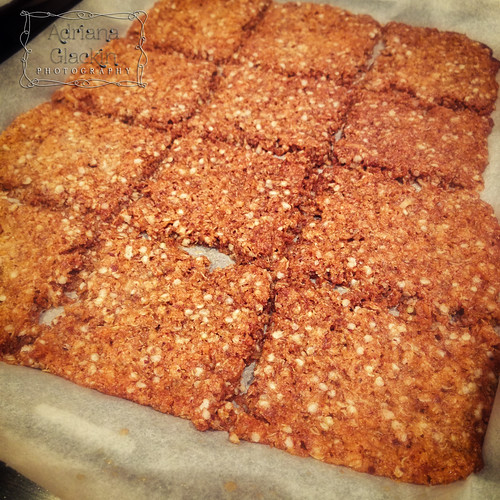
- Now, by this stage I stopped referring to the rest of the original Method and basically threw a spoonful of mixture onto the trays, so that when the whole thing was done - in 10 minutes - it was one ginormous Anzac biscuit! All was not lost, as I used a knife to separate the still warm biscuits and then waited for them to cool before calling the Official New Recipe Tasters, that is, the Family.
Anzac Biscuits - Gluten-Free
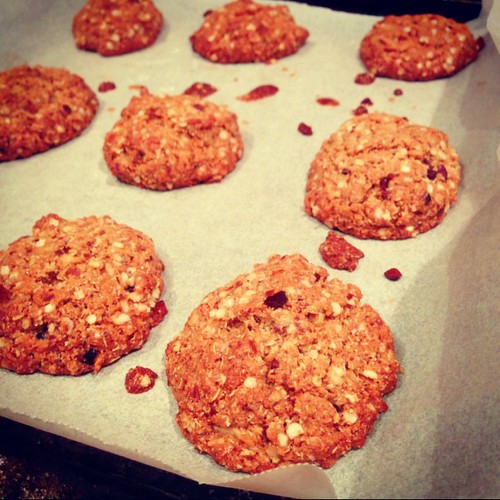
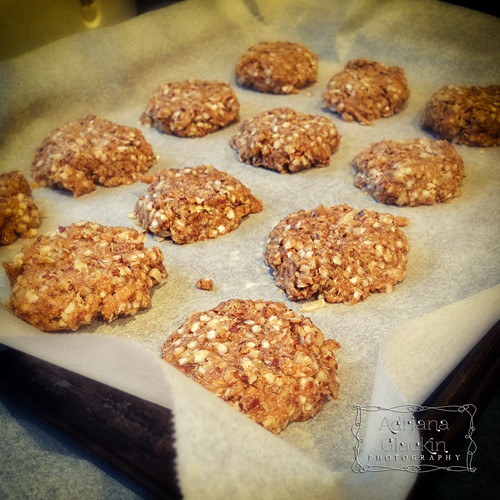
The raw biscuits are definitely not 5cm apart...And that's why it's important to read ALL the instructions...
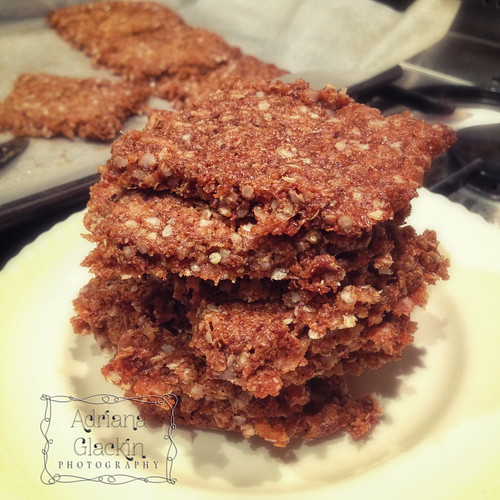
Anzac Biscuits - Gluten-Free
One ginormous Anzac Biscuit for one, or 12 good size biscuits to share...your choice ;)
Freshly baked gluten-free Anzac Biscuits. A lot nicer looking than first batch! #food
EDIT: Batch No. 2, freshly baked. No butter, just coconut oil and a tablespoon of coconut flour

The Verdict? 

"You are making more of these, aren't you?", "Can I have another one?", "These are so nice, can you make more?"

* Note: I wanted to use a blend of both butter and coconut oil and the only reason for the 40:85 blend was that was all the butter I had in the fridge. If you're avoiding dairy, then you should be able to omit the butter and use coconut oil instead. I will try that version and post the results as an edit to this post.

These biscuits are super easy to make, take 10 minutes to bake and they're totally yummy. What's your favourite version of the Anzac biscuit? I'd love to hear your variations on this classic biscuit.

Happy baking :)

Friday, 4 January 2013

Featured Image over at Photographers Connection

I can't tell you how tickled pink I am at having my final image of the "Photographer's 52-Captures Challenge" chosen as Fan Photo of the Week! Following their themes, I was determined to create a new image for each week and what a great opportunity that has been to improve my skills and try things that I would probably never get around to trying. Photographers Connection have started a new 52 week challenge for 2013, but I'll be sitting this one out as I'll be concentrating on a few other challenges this year. A major challenge for me will be the Ride to Conquer Cancer that will take place in October 2013.To find out more, caste your eyes to the left of this page and click on the blue and yellow cycling link. I would love it if you could support my ride :)

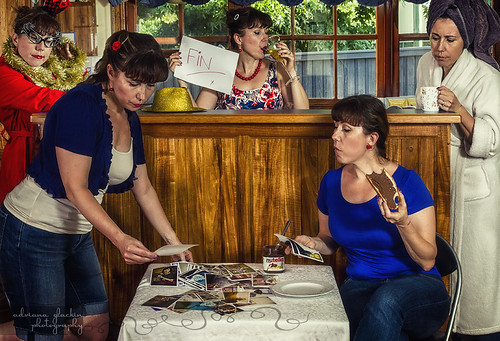
Week 52 ~ Self-Portrait
Week 52 ~ Self-Portrait | Celebrating the end of the project - yeh!

Are you a fan of Photographers Connection Facebook page? Maybe you should 'like' their page and join in the fun! Have you tried photography projects before? Other than Photo-a-Day and 52-week challenges, what other photography challenges have you tried? Drop me a comment, I would love to hear about your photography challenges and projects.

Thursday, 4 October 2012

Week 33 ~ Favourite Outfit

Week 33 ~ Favourite Outfit

This brief was a lot more difficult than I would have thought it would be. Everyone has a favourite outfit, don't they? It took me all week to think of what items I would include - the black and white dress? But which one, all three of them are nice, but they're not 'favourite' material. The red dress? No, not quite. T-shirts? Shirts? What about the french cuff shirt? Nope. In the end I chose items that I thought would look nice in a photo. Is that cheating on the brief, after all I haven't included my favourite items but items that I thought would look nice together. I knew roughly how I wanted the shot to look - like a fashion editorial that you'd see on some random blog. And to that end I hope I achieved that goal. 

And that brings me to the book I've just finished reading, "The Secret Lives of Dresses" by Erin McKean. I remember buying it a few months ago and popping it on the pile ready for reading. I had read a positive review about it and I was looking forward to it being a good read. I don't want to be negative about the book, other than to say that it wasn't the book for me. I've either mistaken this book for another one written about a similar topic (vintage dresses) or I read far too much into the review. Or maybe I'm just not enough of a fashionista and simply didn't appreciate the narrative. 

So, now I have several questions for you - do you have a favourite outfit? Do you know of another chick-lit novel about vintage dresses that you can recommend to me? Have I confused the secret lives of dresses with another chick-lit novel? Did you enjoy reading Secret Lives of Dresses?

Monday, 14 May 2012

Week 12 ~ Something New


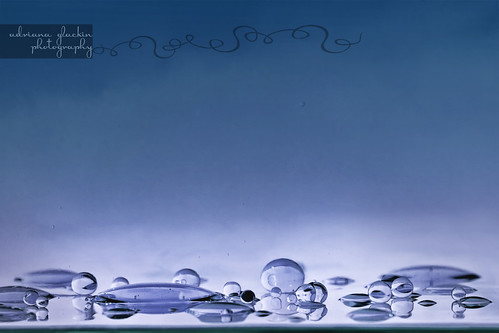
This week I wanted to try a new technique and go for something a little abstract - photographing oil, water, food colouring and glycerin. I didn't have any specific objective in mind, other than to create something totally abstract, and after a ridiculous number of shots, settled on this one as the Photo of The Week. Originally, the colours were yellow-orange, but after staring at them for so long, I had to change their colours over in PS! And, this made it to #281 on Flickr's Explore!

Week 11 ~ Something Old


still life with vegetable (portrait)
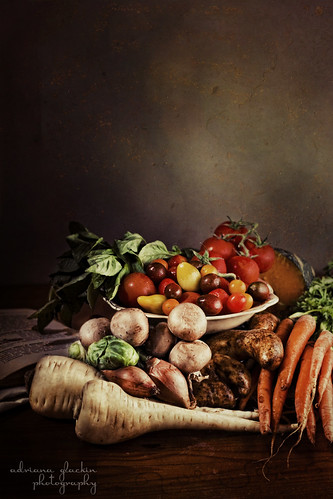
I am way behind in updating this blog with my Project 52 ramblings! But I am determined to catch up on the missed weeks, starting with the theme of Something Old. I’ve been listening to photography podcasts while doing major pruning in the garden – and can I say it’s the best way to get a job done, as you’re engrossed with listening to the podcast, and it’s easy to get carried away. Hence the major pruning! Anyway, back to the podcasts. I’ve been listening about the technique called “pre-visualisation” which is where you see the scene in your mind’s eye before you even begin to create it. Certainly with the theme for Week 11 – something old - the first thing I saw was heirloom tomatoes – I wanted to create a still life featuring these gorgeous and knobbly fruits. There was one major problem – over the course of two days, I visited no less than seven greengrocers looking for these tomatoes, and I was completely out of luck! The season had finished and all I could get my hands on where the miniature ones – that don’t actually look too different to the conventional cherry tomatoes.  So I compromised - if I could find “old fashioned” looking vegetables, maybe I could create a still life setting using vegetables and herbs you would use in an old fashioned vegetable soup.  I bought a selection of less than perfect looking vegetables and herbs and arranged them in a casual way (which takes a ridiculously long time to get right!), I added an old cookbook, complete with my childhood doodles filling some of the pages, then set about organising the lighting.  I think I achieved an “old” looking still life arrangement and it might be a stretch of the theme, but it’s all about making do with what you have at the time.
still life with vegetable (landscape)

I’m determined to shoot a new image for the week, rather than go through my archives in search of an image that will fit the theme. I’m sure this isn’t a pre-requisite, simply something I have set for myself.

Lastly, did I mention that my image “Narrabeen Sunrise” won the Canon EOS Hero Chain a few weeks back!I know! How exciting!

Sunday, 11 September 2011

Better Photography Photograph of the Year 2011 - My News


I've been a little tardy in sharing some photographic news with you. Earlier this year I entered three images in the Better Photography Photograph of the Year 2011. Last year, I also entered 3 images and received three Bronze awards for my efforts. This year, I received two Silvers and a Bronze! I was absolutely delighted with this; I was hoping for a silver and was awarded two! And thanks to those of you who kindly sent me emails to congratulate me - as I hadn't even realised it - one of my silvers also made it on the Top 50 Emotive Portraits page. Win!

Here are the images; they are available for purchase over at Red Bubble or alternatively contact me via this blog.


Monday, 1 February 2010

How different Photographic Treatments change the look of a Subject

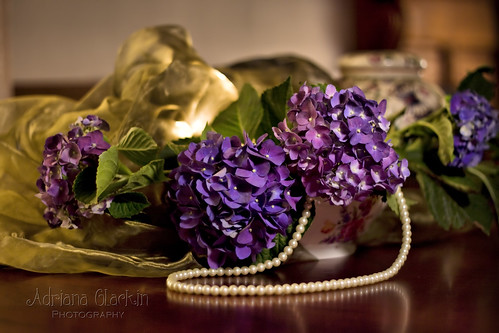
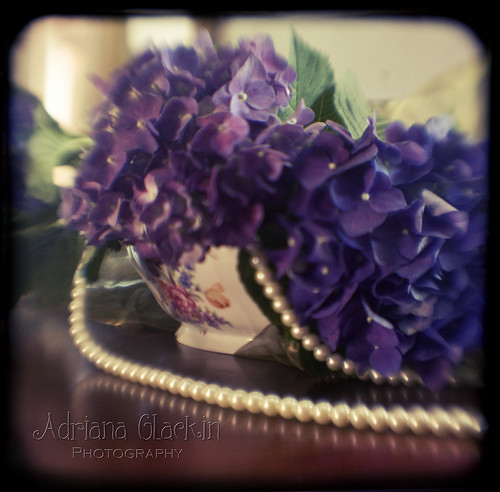
Take a bunch of hydrangeas, a hand painted ceramic bowl, a string of pearls, a cedar table, some floaty organza and a couple of torches.  Add to this mix your favourite camera equipment and your editing skills.  Get busy and arrange the items in a pleasant fashion. And now experiment!

In the first photograph, a standard 50mm lens – the plastic fantastic, diffused torchlight, and a long exposure of a couple of seconds was used.  The diffused torchlight was used to “paint” the light onto the hydrangeas.  The brightness, contrast, levels were then adjusted in Photoshop to get this final results.

Still Life Hydrangeas - straight photo

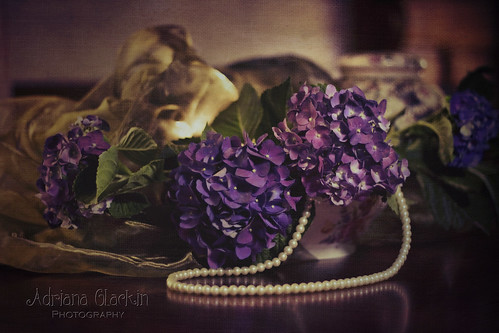
There’s a real trend toward adding textured layers to photographs these days.  Adding textures really changes the feel of the photo.  It somehow ages the photo, giving it a real retro/grungy/moody look.  I recommend you shoot your own textures or if you really prefer, you can obtain free textures by simply searching Google for “free textures”.  I’ve used 3 different texture layers (my own) to the original image, and have blended them using varying opacities and blending modes.   I find I use overlay, soft light, hard light and multiply the most.


still life hydrangeas - textured

This image is identical to the image above - it has been layered with textures to change it's appearance to a more moody and vintage look.
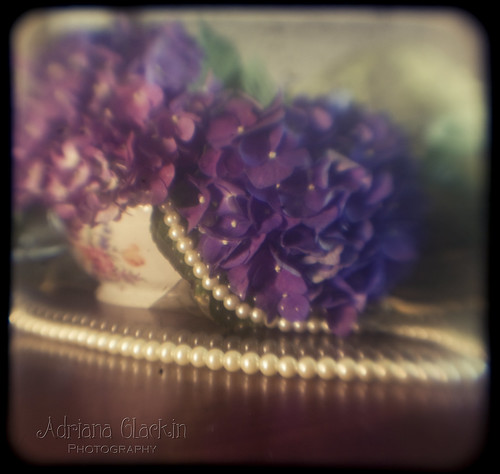
This final image was shot using a very different technique – in fact it’s a blend of two techniques that I enjoy – the dreamy Lensbaby and the Through the Viewfinder techniques are absolute favourites of mine.  Different brands of Twin Reflex cameras will also yield varying results.  So, in these final two images, I used the Lensbaby Muse with the +4 macro filter; I inserted that into the “tube of darkness” which directly points to the viewfinder on the top of the Twin Reflex Camera.  Using the Muse lens, really softened the overall look of the image and the square format plus some cross-processing, gives it an aged appearance.  Follow this link if you’d like to know more about the Through the Viewfinder technique.


Hydrangea TtV - argus
Through the Viewfinder using Lensbaby Muse +macro 4 filter and Argus Argoflex Camera

Day 31 of 365
Through the Viewfinder using Lensbaby Muse + macro 4 filter and Kodak Duoflex Camera


Coming Soon - How to apply textures to your images.

Thursday, 1 January 2009

New Year, new start...

2009 is here and with the start of the new year comes the fresh outlook we strive for. A new beginning, a time for resolutions. These can be silly, mundane, difficult, challenging, whatever your resolutions may be, let's hope your goals move you forward and allow you to grow.


One resolution for me - to be plain silly. Don't take myself too seriously, relax and have fun, chill out. That's exactly what I did when I shot this image of my Christmas dress in the pool - just a refreshing spot of being silly. I love the colours, the flow and the refreshing nature of the image.


Monday, 8 September 2008

Feature Monday - Ripples Art Exhibition

I'm grinning from ear to ear at the moment and have to keep pinching myself! There is an art exhibition being held, starting tomorrow and I'm exhibiting 6 of my photographic images! There are 10 artists in total, including other photographers, as well as textile artists, painters, wood turners, jewellery makers and potters! All these years I envied the creative types, and the shows they do, and now here I am taking part in my first show! I can certainly tick that off my list of things to do before I die!!
As part of my Feature Monday, I've included images that will be included in the exhibition, one from Cordelia and the other by rsmac. So if anyone here in the virtual world is going to be down Kiama NSW way this week, then pop over to the Old Fire Station and have a look at the Ripples Creative Splashes Exhibition!

"even when you're gone" by me

Monday, 1 September 2008

Still Life Photography - Feature Monday

Boy, that's come around quick! Feature Monday...and this week I'm bringing you some examples of Still Life Photography. In my opinion, it would definitely have to be the safest form of photography - but that's where the simplicity ends. While you don't need to worry about your objects moving about, or throwing tantrums, or being generally off, or be subject to the weather, there is still much to consider before actually pressing the shutter. Yes, you can photograph your still life at any time you find works for you, and take your time with the shots, there is still a fine art, a skill involved in actually taking a still life photograph, to one that is simply a happy snap of some objects bunched together. Lighting, positioning, the objects chosen, the depth of field, the angle are some of the factors to consider when "staging" a still life photograph. What are you trying to portray to your viewer - is something else to consider - is there a message to your still life - is yet another factor to consider. And while it's true that you don't need to worry about being rained on, or injure yourself while out in the wilds - there's a lot more than meets the eye when it comes to still life photography.

Here are some examples to look at:


Harmonious Shells by Maria Madeiros


Lilies by Rose Atkinson


Still Hooked by Debbie Black


Nails and Nuts Figure by VashR31


still life by me :)

Monday, 28 July 2008

Fine Art Photography - Feature Monday

I was reading an on-line blog today and the topic was "Home Decorating Tips: Where to Hang Your Fine Art" and that got me thinking - now that I've learnt how to hang and how not to hang my fine art, the next decision is of course - what will I choose to hang on my walls? So, for this week, my top 3 images that I would love to hang on my walls would have to be these three - enjoy!


Monday, 21 July 2008

Feature Monday

A great retro feel to this image - I'm either waiting in a 1950's hairdressing salon, or I could be at a country RSL club waiting for the weekly dance to start.


"so uncool it's cool..." by elliewinds


* * *

This image has the ability to transport me to another time and another place...


* * *

This certainly has "wow" factor - look at the windows, the bricks and compare that to the lettering...just how big and bld is that building???


* * *


There's something quite beautiful in seeing an artist give their all and enjoy their craft.


* * *


An image exuding new life, new beginnings, new growth and let life take you where it will.


* * *
Sometimes in life, standing on the sidelines and watching the world go by gives you the space to think and reflect on what life can offer you and just how much you want to get out of it.


"Contemplation" by Debbie Black


Wednesday, 16 July 2008

Did you know this about Sepia Photography?

Historically, photographs were treated with sepia toning as it rendered them longer lasting than their Black & White counterparts. Today, sepia tones and digitally produced images are as popular as ever. Creating a digital sepia toned image today is as easy as changing the setting on your digital camera or editing the images in graphic softaware programs such as Photoshop CS2.

Adding a sombre, serious, old-timer effect, sepia tones can be applied to many subjects and can really change the mood of the image altogether. Below are some examples:


* * *


* * *


"Small in Sepia" by Debbie Black

* * *


* * *


"will nobody love me?" by Adriana Glackin


Tuesday, 15 July 2008

Ten Tips for the Absolute Photoshop CS2 Beginner


So you’ve finally installed your copy of Photoshop CS2, the one your friends have been raving about for months now and telling you how good it is and how you won’t be able to live without it.  Yet, once installed, you can’t make heads or tails out of it?  The language seems so foreign and you have no idea just where to start.  Here are 10 very basic tips on getting to know and love Photoshop CS2 – you’ll see that in no time, you’ll agree that your friends are right on this one – you won’t be able to live without it!


Let’s begin:


1.      When you open up an image for the first time, make a copy of that image and give it a name.  Then promptly close the original image so that you have a record of it.  To do this, simply go to the “layers” panel, right click on the background image and then select “duplicate layer” and select “new” in the destination bar.  It’s good practise to do this each and every time, so that you maintain a record of the images in their original format, to those that have been edited.


2.      Digital cameras use their sensors to see the images we see with our eyes.  Sometimes images captured with our cameras aren’t as we remember them.  That’s because no matter how sensitive the sensor, they’re still no match for our own eyes.  To try and replicate the image we saw with our own eye, we need to tweak the levels, the contrast and the colour.  When you’re just starting out, simply select “image” from the toolbar, go to “adjustments”, then select auto levels, auto contrast, and auto colour.  You can always undo these steps in the history panel.  And when you get more comfortable with PS, you’ll be able to tweak the levels, contrast and colour yourself from that same “adjustment” menu.


3.      Is the photo still lacking that little something?  Perhaps you need to apply “curves” to it.  No, it won’t warp it into something unrecognisable (unless you want it to...)   curves will simply help with the tonal range of your image.  If your image is lacking contrast, it could be that the curve is a little flat.  To remedy this go to “image” in the drop down menu, select “adjustment” then “curves”, a graph will display and you will want to make that line follow an “S” shape.  As you’re tweaking it, watch the changes on your image, then simply select ok when you’re done.


4.      Now, speaking of warping images.  You’ve taken that perfect shot of that sunset.  Compositionally it’s perfect, the colours to die for, but your horizon is crooked.  Do you delete the image? No, of course not!  Do you live with the image as is? No, of course not!  To correct something like a crooked horizon line, go to “Select” in the toolbar, select ‘all” – you should have marching ants surrounding your image (hoorah!), go to “edit” in the toolbar and select “transform” from the menu.  Now you have a selection of different methods of transforming your image – and it will depend what you want to do with it as to which method you choose.  For this example, let’s select “skew”, then use your cursor to straighten up that horizon.  When you’re done, just hit enter, the computer will have a think and you’re done. 


5.      If you’re still not sure whether that horizon is straight or you simply want to see if you’re following the “rule of thirds”, then go to “view” in your toolbar, select “show” then “grid” – these gridlines will tell you just how straight the lines in your image really are.


6.      Get to know and love “Layers”.  That is the one big mystery that catches beginners in PS time and time again.  I’m sure volumes can be written about Layers alone, as they are crucial in turning an ordinary image into a WOW image.  Layers means that you can divide your creation into different parts by assigning these parts to different layers.  Different “layer effects” can be applied that can enhance your image, and you can blend more than one image together to create a totally new image – this is all possible by using layers.  If I have an image of a flower and the background isn’t especially pleasing, then I can create a layer, position this above the flower image, select a brush and colour of my choice and begin to paint on that new blank layer.  You haven’t destroyed the flower image, and any excess painting can simply be erased.  Which brings me to the next point,


7.      Make “Layer Masks” your next best friend to using layers.  Using the analogy of painting a more interesting background for your flowers, there is an icon in your layers palette – the circle in a square, select that icon and you will see it will appear on the layer you had active.  Making sure that the mask is the active of the two images on that layer, now select the “eraser” tool and make sure that the colour selection in your toolbox is set to black and white.  White will erase what you have painted, and the black will add the paint back again.  What this means, is that you won’t lose the image as it stands.  There is nothing worse than making changes, finding you don’t like them, then finding you have to start all over again as the history panel has only gone back so far.  Using layers and layer masks will help save a lot of time and effort, as what they do is act as a record for each editing change you make on your image.


8.      Again discussing layers, don’t be afraid to select a choice other than “normal” when applying layers.  One effect that is popular and creates a dreamy, diffused effect to your image, is the “Orton Effect”.  To do this, you will need to duplicate your background image.  Now with your duplicate, go to your “filters” toolbar and select “blur” then “Gaussian blur”, depending on your image and the effect, choose any number of pixels here.  The greater the pixels, the more diffused and exaggerated the effect.  Select ok, then go to the layers panel, select “multiply” and you now have a soft, dreamy, moody image.  Selecting other effects such as overlay, soft light, hard light and so on will yield you different results, so have a play with the effects.  You can always tone it down by moving the slider from 100% opacity to a lower amount.


9.      Could your images use a little more sharpness to them?  There are several ways of sharpening your image, but for me the easiest and most effective is the “High Pass” method.  Begin with your background image, then duplicate.  Go to the “filters” toolbar and select “other” from the drop down menu, then select “high pass”.  Here is where you don’t want to overdo it.  Only select between 1 and 2 pixels for a realistic look.  The image shown should be quite grey with only the sharpest areas highlighted.  Select ok, then in the layers palette, select “overlay” and your image is now sharper and crisper.  If you still want to retain some areas that aren’t as crisp, simply apply a layer mask and erase the part of the high pass image you don’t want (remember to make sure you’re erasing the mask, and not the image).


10. Lastly, don’t be afraid to explore and play with his wonderful program – it has so much to offer, that these 10 basic steps really don’t even do it justice, but they’re a way to slowly introduce you to the joys of Photoshop.  Keep a pen and notebook beside you so that you can record your steps and discoveries  – there’s nothing worse than trying to remember exactly what you did last time.  Most importantly, have fun, enjoy and create!
Monday, 14 July 2008

Feature Monday

For the feeling of isolation and strength:

Cape du Couedic by Tom Vaughan

* * *

For the feeling that love will conquer all:

After all we've been through... by myoriginalsin


* * *

For the sheer pleasure that such music evokes:

Only the light reveals your workings by Jordan Ewart


* * *

For the history and mystery of what lies behind each door and window:

Antiques by Sue Wickham


* * *

For the decaying beauty:

Window into Budapest by Adrian Rachele


Red Bubble Gallery

Red Bubble Gallery
view my photography at Red Bubble