Thursday, 26 June 2014

Nutella Bread and Butter Pudding - Yes, it's Gluten Free!

It's no secret that I love Nutella and that the only reason why I don't buy those ginormous jars of Nutella isn't because of price, but because it would mean I would need a whole new wardrobe. And who can be bothered with that. Everything in moderation, blah, blah, blah.

Anyway, the point of this post is to share a recipe I've tested out a couple of times, and one that's perfect for those cool, crisp and wild wintery days. Nutella Bread and Butter Pudding! Minus the butter...and this version is gluten free. I was inspired to create this version when I stumbled upon this one. Read on for the list of ingredients and method:
It's not pretty, but it's pretty delicious!


Ingredients:


1 loaf Gluten Free Bread*
1 jar of Nutella - be generous
400ml milk
600ml thickened cream
5 eggs
100g maple syrup**
dash of Marsala***
butter for greasing the baking dish


* I baked this loaf using Laucke Flour Gluten Free Bread Mix.
I also added the chocolate bits just in case the pudding wasn't chocolatey enough.
You can use store bought bread or your own bread recipe.

Method:


1. Preheat oven to 180 degrees celsius (fan forced)
2. Grease a largish baking dish with the butter. Generally gluten free loaves are smaller than standard loaves, you will still need a large baking dish.
3. Spread a generous amount of Nutella on each of the slices of bread, then cut into triangles. Don't be tempted to cut multiple slices at a time as Nutella is very sticky and the gf bread crumbly. Be patient and slice each piece one at a time. Or maybe use a sharper knife...maybe my cutting skills leave a lot to be desired...

Don't skimp on the Nutella. Be thorough in your coverage.


4. Arrange the Nutella triangles in the baking dish. You can be as neat or as messy as you like. Overlap the bread if that's what's going to make you happy. Sprinkle that dash of Marsala over the Nutella triangles. Consume any leftover Nutella triangles that don't fit into the baking dish...it would be rude not to...

Pack those Nutella triangles in together!

5. In a pan, pour the milk, cream, dash of marsala (yes, another little dash), the maple syrup, give it a stir and heat. While you wait for the mixture to come to an almost boil, whisk together the eggs. Gently pour the egg mixture into the hot milky mixture, whisking the whole time. Remove from the heat, whisking as it starts to slightly thicken. I then poured this mixture into a jug, with a spout, then carefully saturated the Nutella triangles. I could have poured the mixture straight from the pan onto the Nutella triangles, but I would have made a mess and I would have spilt the mixture all over the bench, it would have dripped on the floor, I then would have slipped on it while reaching for the paper towels to clean the mess up. The doorbell would have rung at that very moment and my friends would have arrived and been shocked at the mess and the ruined dessert and would have probably returned to their car and would have gone home, upset that their afternoon of eating a yummy dessert had been crushed. I wouldn't have been able to cry, as everyone knows you shouldn't cry over spilt milk. So, bearing all this in mind, it was easier to pour the mixture into the jug to begin with. You may not need to do this if you're not as clumsy as me.

Ensure all the bread is soaked with this warm eggy mixture.
6. Place the baking dish into a larger baking dish and half fill that with water. Cover the dishes with aluminium foil and place into the oven for 15 to 20 minutes. Test at about the 15 minute mark. If the mixture has set, then by all means turn off the oven and let the pudding rest while you gather the biggest bowl you have and grab the double cream from the fridge. If it's still not set, then be patient but don't get too distracted - you don't want to dry out the pudding by overbaking it! Once the pudding is cooked, then serve with some double cream or ice cream and enjoy!


Notes:

* There are quite a few gluten free ready baked breads on the market now, so you can choose from one of those. I've been baking some different varieties, but have found with a recipe like this one, sticking to a traditional style bread works best. Again, there are several gluten free bread mixes you can experiment with and I've had success with a few of them. I've also baked from scratch, but find these breads to be a lot heavier than traditional bread.
** You don't need to use maple syrup, you can use any sweetener of your choice. I tend to make this recipe for friends and so add the extra sweetener for their benefit. If you're trying to watch your sugar intake - which would be hilarious with a recipe such as this one - then eliminate the additional sweetener altogether.
*** Marsala is my dessert cooking wine of choice. You may prefer to use Kahlua or Frangelico or not use any alcohol at all.
Another note, you can make variations of this recipe - if you have a friend who, for example, doesn't like Nutella (is that even possible?  have you heard anything so preposterous?) (sorry P!!!) then butter and jam can be used. Sultanas or raisins can also be added, as per the original recipe that inspired this experiment.


I hope you try out this recipe, and if you do, then drop me a line and let me know how you got on with it. Do you experiment with recipes? What's your favourite Nutella recipe?

Friday, 21 March 2014

Here We Go Again...

Perhaps the full moon can explain the strange goings-on around me this week. Goings-on that have made me raise my eyebrows a few times, smirk just a little in amazement and slightly nod at the oddities. Whatever has caused the out-of-character behaviours, I will now be adding to them by posting on this blog once more - where I was so certain this blog would be in indefinite hiatus for reasons too boring to mention, I've changed my mind. When I spoke out loud to a couple of people about blogging, I realised that I missed rambling on about nothing and that not posting was more stressful to me than posting. Work that one out.

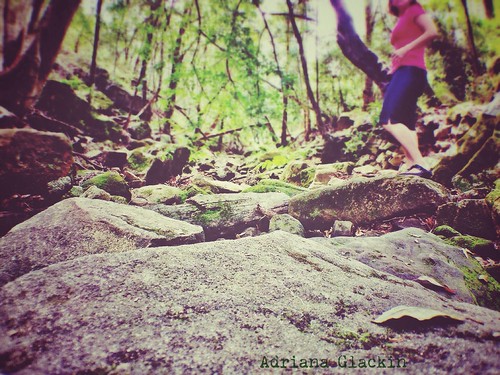
The pathway leading to the creekbed was littered with what seemed to be blueberries.
Lots of them. I wondered who would misplace so many blueberries.

So let me share here my photography project for 2014 --- 52 themed self portraits. I resisted for the first few weeks* until I realised that the photos fitting the themes had been taken by default and using my iPhone **. We are now in Week 12 and have to admit that I am actively participating in this project, and no longer reluctantly. The theme for Week 12 was "The Great Outdoors". Living in the Blue Mountains and surrounded by endless bushland gorges made this week's shot a no-brainer. Time was my only issue so I used the small window of time I had to seek out this quiet creek bed, set up the iPhone on the teensy little tripod I bought online, set the camera app to self timer and get into position without slipping on the mossy rocks. I discovered the interval timer on the app which meant I didn't have to run back and forth to the iPhone - what a win! To edit the shot, I used the Snapseed app and the Camerabag app - both pretty flexible editing tools.

In the midst of this week's chaos, disorder and busyness, "The Great Outdoors" theme was perfectly timed, much needed and much appreciated. Ahhh, feel the serenity!


* Aren't I getting a bit long in the tooth to be taking selfies? Yes, yes I am, and what of it?
** That's really the challenge here I feel, can I take 52 self portraits that won't look like quick grabs you would normally take when out with your girlfriends? Can I make them look "arty"?

Wednesday, 20 November 2013

A long time between posts

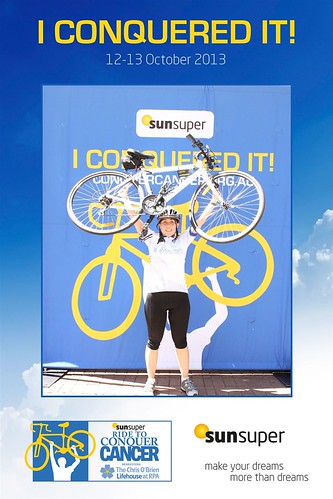
Sydney Ride to Conquer Cancer 2013
Yep, that's me in lycra holding up my bike at the end of the 200km ride
Life has been very busy and I've allocated very little time to blogging. The way the end of year is shaping up, it looks like it will be a while again before my next post. I did, however, want to update you with the result of My 2013 Challenge. If you followed the link, you'll see that I was a member of Team Blue Magic. Our goal was for each rider from our team to reach the fundraising target of $2,500.00 each in order to participate in the 200km cycle. I can't tell you how proud I am to say that not only did we reach - and exceed our target - we all rode AND all completed the ride! Camping overnight, using port-a-loos and port-a-showers for the first time was a claustrophobic and eye-opening experience I don't want to repeat again in a hurry, but the weekend was amazing!! Team Blue Magic are the Best Team Ever!! Even more amazing was that our little team of 8 riders raised over $32,000 for The Chris O'Brien Lifehouse in Sydney.  I'm so very proud to have been part of that team and if you happen to be one of the many people who donated, then I thank you from the bottom of my heart!

So, for now, this blog will remain in hiatus until the merry-go-round that is life slows down so I can catch my breath and start up blogging again. I'll still be around the net, commenting, posting images, tweeting... Blogging will simply take a backseat. Ta ta for now. x

Tuesday, 11 June 2013

Linky Love #4


It's been a while since the last Linky Love and I'm sitting here editing photos from several weeks ago. The computer is being slow, an eclectic mix of music courtesy of iTunes shuffle is playing in the background and I thought I'd add another task while I sit here and wait for the computer to catch up - one image at a time.

One of these days, I'm actually going to use this handy little generator  and create magical things.

I've be blown away by the sheer cleverness of some people.

When I've been in the kitchen, I've been making all sorts of variations of this recipe. Totally nomalicious!

Long summer days are a memory ago as the winter chill is making itself felt around these parts. In life's busy-ness, I didn't share this little iPhone feature with you. My image is the fourth amongst the fifteen finalists for that week. Ahhh, summer...how I'm counting down the weeks....

If you have some spare cash floating around, I'd love for you to donate to this worthy cause. The date is getting closer and I need to reach my target, or I don't ride - yikes!

And a final bit of silliness that is oh-so-clever!

Friday, 17 May 2013

Chocolate Lava Cupcakes

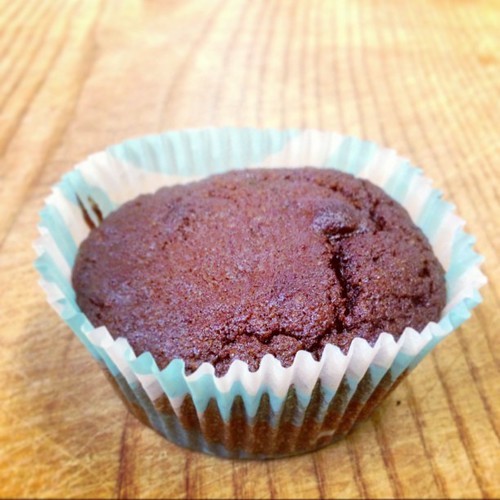
I dub thee 'lava cupcake' #food #glutenfree
One of the holiday batches of Chocolate Lava Cupcakes

A few weeks ago while away on holidays, I took advantage of not only being in holiday mode, but also being in a new kitchen, new oven, fairly bare cupboards and did I mention that I was in holiday mode? As there are about 20 families we go away with, we try and organise a Ladies' Afternoon where wine and nibblies are consumed, with no husbands or children in sight. And that is where this recipe was born. I had limited supplies and a couple of my friends have special dietary requirements, so I wanted to make sure the recipe would be safe for them to enjoy. I managed to make a few batches while away and before you ask - who bakes while they're on holidays - you'll see from the recipe how simple it is to whip up. No fancy gadgets required!

So where did the name Chocolate Lava Cupcakes come from? One of the hundreds of kids that belong to one of the 20 families asked if he could have a cupcake - in a most polite and sweet way, and I simply couldn't refuse such sweetness! While enjoying the cupcake he told his mum he thought the inside was like lava - all molten and gooey and delish! The name was perfect and they've been known as Chocolate Lava Cupcakes ever since. So, thank you to T.'s young son for naming these cupcakes, I couldn't have given them a better name!

There are a few variations to the recipe and I'll include those details in the notes.

Chocolate Lava Cupcakes


Ingredients:


2 1/4 cups almond meal
3 - 4 tbs cocoa powder, unsweetened
generous handful of dark chocolate buttons
1/4 cup coconut oil
3 generous tbs of glucose
1 cup mashed pumpkin
2 eggs
1 tsp baking soda, gluten free

The dry ingredients laid out

Method:


* Preheat oven to 160°
* Place all the dry ingredients into a bowl and mix together with a wooden spoon.
* Add the eggs, mashed pumpkin, glucose and melted coconut oil.
* Stir with a wooden spoon until combined.
* Place the batter into cupcakes and bake for about 15-20minutes. It will depend on size of cupcake wrappers and your oven, of course.

Adding the wet ingredients to the dry mixture

The batter's ready to be placed into waiting cupcake wrappers

Fresh from the oven. this batch made 8 large cupcakes

I allowed the cupcakes to cool before whipping them straight into the freezer

Additional Notes:


* If you don't want to use mashed pumpkin, you can use a cup of pureed apple instead. If you're using apple puree, then ease up on the glucose or it may be too sweet for you. For a wholesome Red Velvet Chocolate cupcake, add a cup of raw finely grated beetroot.
* You can substitute Honey or Rice Malt Syrup if you don't have Glucose. Some may find the recipe not sweet enough, especially if they're used to eating store bought or traditional cupcakes, so you might need to add more sweetness. You could also use Stevia, I tend not to use a lot of that as I don't like the taste of it.
* When you're testing for readiness of the cupcakes, you want the skewer to be a bit dirty, but not wet. In other words,you want to under-do them to get that lovely moist "lava" quality.
* Feel free to add things like vanilla or your favourite nuts or even date chunks. Remember, I had limited items at the time.
* If you want an egg-free version, then use 2 tbs of chia seeds to 1/2 cup of water. Stir the seeds and water and wait for the seeds to expand, forming a jelly-like goo. This can then be substituted for the 2 eggs.
* The measurements I've included are approximate and even when I make batches of the cupcakes now, I play around with the quantities.
* This recipe is Gluten-Free and Paleo-friendly.

I hope you enjoy this recipe and if you have any questions or suggestions then feel free to post a comment.


Wednesday, 15 May 2013

Serendipity in Autumn

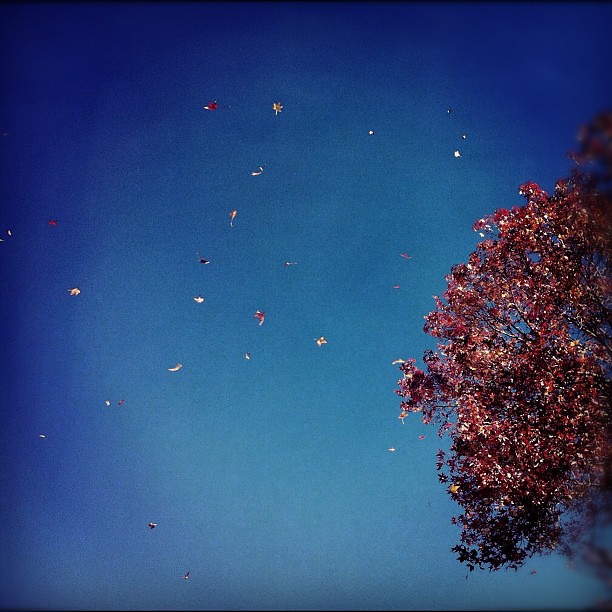
There has been that crispness to the air this week, that only autumn brings. The sun is still shining but the sting in the cool breeze reminds you it's time to add another layer of clothing and perhaps think about airing the winter doona. Our neighbour has a glorious liquid amber tree that stands as a beacon of reds and golds and rust at the moment, and today while I was doing the mundane task of hanging the washing on the line, I stopped and watched how the breeze was picking off the leaves and sending them whirling, twirling, cascading to the ground (and into the pool...). I did chuckle to myself when I thought of this autumn tree. And then I thought of the iPhone shot I took, was it last year or the year before? The well timed shot showing the leaves being flung from the tree...hmmm... I couldn't quite remember so I continued the task at hand so I could get back inside and away from the chilly air.

Scattering autumn leaves in today's warm breeze

Much later when I was checking my emails, a serendipitous moment occurred! For in the bunch of emails was none other than the one I receive from Photojojo, reminding me what I was doing a year ago, in images, thanks to their Time Capsule email. I can't remember when I signed up for it, a while ago now I'm certain. I love getting this email and I have to say that I never remember it's due until I see it in my inbox, then it's usually the first email I open so I can see what I was doing a year ago. So when I opened the Time Capsule, there was the shot! "The Scattering autumn leaves in the warm breeze" shot, taken on the 11th May last year. The tree is looking a little bare this year and the wind was definitely not warm but the dancing leaves were just as beautiful.

Have you signed up to the Photojojo Time Capsule email? If you've got a flickr account, then what are you waiting for?! It's sure to put a smile on your face as you go back in time and view what you were doing this time last year. Especially today when we tend not to print up our images, what better way to revisit your photo archives than with this little time capsule.

And because you can never take enough autumn photos, here's some dreamy samples I shot with the Olympus E-PM1 and a homemade bendy lens:

Serendipity in Autumn I Serendipity in Autumn II Serendipity in Autumn III

Oh, and as an aside, to let you know that the Sausage Sizzle and Cake Stall held in Leura this past weekend raised over $800 for Team Blue Magic! Thank you to all our supporters and I hope you enjoyed the cakes, slices and sausage sangers!


Friday, 10 May 2013

Fundraising Sausage Sizzle and Cake Stall - Leura

This is a shout out to all those who will be in the Leura area on Saturday 11th May 2013. The Blue Magic Team will be hosting a fundraising sausage sizzle and cake stall outside Woolworths starting at 9am. The proceeds will be going towards Ride to Conquer Cancer taking place later this year. Team members have been busy baking all sorts of treats including wheat-free chocolate cupcakes (seen here), banana bread and cake, banana and raspberry bread, banana and carrot cake, apple sour cream cakes, chocolate pretzel slices, lemon and poppy seed cookies, honey iced coffee cake and many others. This list of goodies is making me hungry!
Sweet treats for fundraising Cake Stall
Wheat-free Chocolate Cupcakes you'll find at the cake stall


So, what are the details again?

Fundraising Sausage Sizzle and Cake Stall

when: Saturday, 11th May 2013

where: outside Woolworths at Leura Mall, Leura NSW

time: 9am start

Proceeds will go towards the Blue Magic - Ride to Conquer Cancer Team.


You know, with Mother's Day being this Sunday, maybe take a run up the mountains, buy Mum a gift from one of the specialty boutiques in Leura, have yourself a sausage sanger, buy a cake or slice then mosey on back down the mountain and present Mum with the yummy cake or slice you've bought.

If you can't make it to Leura on Saturday morning - you know it's quite gorgeous at this time of year and the shops at Leura are a must-visit, and the stunning autumn colours are quite spectacular  - then, please consider donating anyway. All monetary donations will be gratefully accepted.

Have a lovely Mother's Day, whatever you decide to do :)

Wednesday, 8 May 2013

Quick, Easy and Healthy Banana Pancakes

A few weeks ago my friend C. told me of a very quick and easy banana pancake recipe and I had all but forgotten about it until this morning when I spied the bananas in the fruit bowl. I don't know if your household is the same, but bananas in my household are either immediately scoffed and you question whether you actually bought them in the first place, or they're completely ignored and then the only thing they're good for is for baking into banana cake/bread/muffins.

Back to the quick, easy and healthy recipe - and this is yummy enough to be served up as an afternoon snack and dare I say it, even dessert!

Quick, Easy, Healthy Banana Pancakes

What you'll need:

1 banana, mashed with a fork
1 egg
Sprinkling of cinnamon powder

1 sandwich press
3 egg rings that you've greased with a little bit of butter.

* This is enough for one serving. You can alternate the egg/banana ratio depending on how many bananas your family has left you, and how many people you need to make this for. I waited for the family to head to work, school and uni before making this - sneaky, I know ;)


I really should have cleaned the sandwich press, or at least photoshopped the crumbs away...


Method:


Preheat your sandwich press. Mine doesn't have a temperature control dial so it's either off or on. Place the 3 greased egg rings on the sandwich press. In a small bowl, add the egg to the mashed banana and keep mooshing together until a nice gloopy consistency is created. Sprinkle some cinnamon powder to taste. Pour the mixture into the egg rings and close the lid. It only takes a few minutes to cook, so while you're waiting, you can slice up some seasonal fruit or raid the pantry for nuts. Grab a plate, test the pancakes to make sure they're cooked (I did this by cutting into one of them). Run a butter knife along the edges of the egg ring in order to release the pancake. Stack the pancakes on your plate, add a dollop of ricotta and the seasonal fruit, then finish off with another sprinkling of cinnamon. Sit down and enjoy it!

Delicious breakfast for one. Nom!

Alternatives:

* Omit the ricotta if you don't eat dairy, use a dollop of tahini instead.
* If you prefer your food a little sweeter (note that I didn't add any sweeteners natural or otherwise), then add a squirt of honey or your favourite sweetener to the eggy mixture.
* To turn this into a simple dessert, add a handful of dark chocolate bits to the eggy mixture, then serve the lot with ice cream or sorbet or yoghurt.

There would be countless alternatives to this simple recipe. Best of all, it's quick, you don't need any high falutin' appliances and the resulting dish is delicious, wholesome and versatile. Give me this delicious breakfast to the alternative breakfast that's served up from a cardboard box any day!

Thanks so much C. for the great breakfast tip! xx


Monday, 22 April 2013

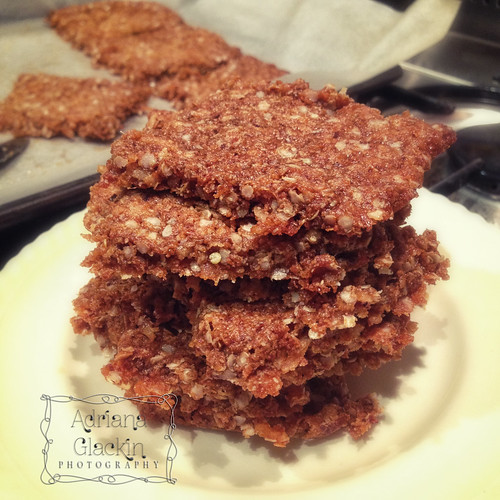
Anzac Biscuits - Gluten Free

It's been a while. Life has been busy and hectic, in a good way. I thought I'd share this quick recipe with you. The original can be found here. If you're looking for a gluten-free alternative, then the recipe below is my first attempt at making a gluten-free version of this biscuit.

Anzac Biscuits - Gluten-Free

Anzac Biscuits - Gluten-Free

Ingredients:


1 cup Almond Meal
1 cup Quinoa Flakes
1 cup shredded coconut
40g Butter *
85g Coconut Oil *
1/2 cup Coconut Palm Sugar
2 tbs Golden Syrup
1 tsp Bicarb Soda

Method:


The method follows the original recipe I have linked above, which is:

- Preheat oven to 160°C and line 2 trays with baking paper.
- Mix the almond meal, quinoa flakes, shredded coconut and bicarb soda together in a mixing bowl.
- Melt the butter, coconut oil, golden syrup and the coconut palm sugar in a pan. It will look like a brown thick-ish splodgy mess, but that's ok.
- Pour the melted mixture into dry mixture and stir with wooden spoon.
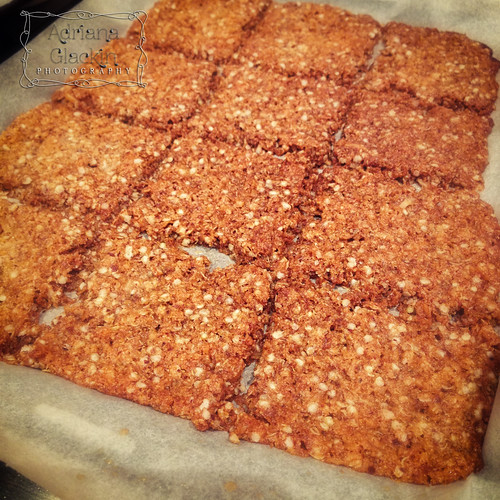
- Now, by this stage I stopped referring to the rest of the original Method and basically threw a spoonful of mixture onto the trays, so that when the whole thing was done - in 10 minutes - it was one ginormous Anzac biscuit! All was not lost, as I used a knife to separate the still warm biscuits and then waited for them to cool before calling the Official New Recipe Tasters, that is, the Family.
Anzac Biscuits - Gluten-Free
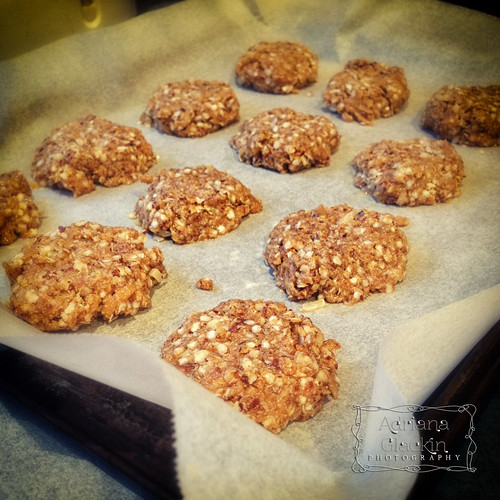
The raw biscuits are definitely not 5cm apart...And that's why it's important to read ALL the instructions...
Anzac Biscuits - Gluten-Free
One ginormous Anzac Biscuit for one, or 12 good size biscuits to share...your choice ;)
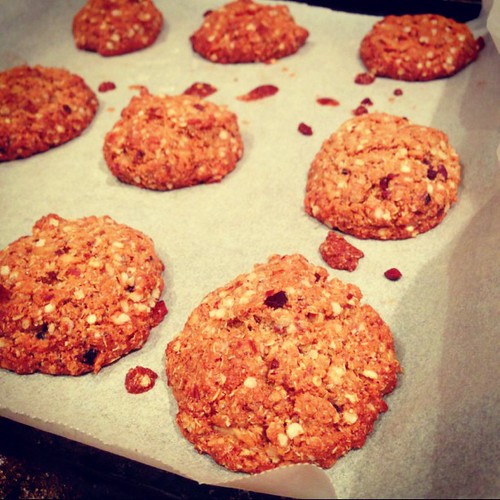
Freshly baked gluten-free Anzac Biscuits. A lot nicer looking than first batch! #food
EDIT: Batch No. 2, freshly baked. No butter, just coconut oil and a tablespoon of coconut flour

The Verdict? 

"You are making more of these, aren't you?", "Can I have another one?", "These are so nice, can you make more?"

* Note: I wanted to use a blend of both butter and coconut oil and the only reason for the 40:85 blend was that was all the butter I had in the fridge. If you're avoiding dairy, then you should be able to omit the butter and use coconut oil instead. I will try that version and post the results as an edit to this post.

These biscuits are super easy to make, take 10 minutes to bake and they're totally yummy. What's your favourite version of the Anzac biscuit? I'd love to hear your variations on this classic biscuit.

Happy baking :)

Friday, 25 January 2013

iPhoneography Book from Blurb

Late last year I put together a collection of some of my favourite iPhone images in a book over at Blurb. There was a promotion at the time, so I chose images that made me smile and reminded me of the place or occasion, and using Blurb's template, hey presto! a mini book was created. I ordered said mini book and was chuffed with the quality and the rendition of my images. Yeh!

Here's a selection for you to look at:

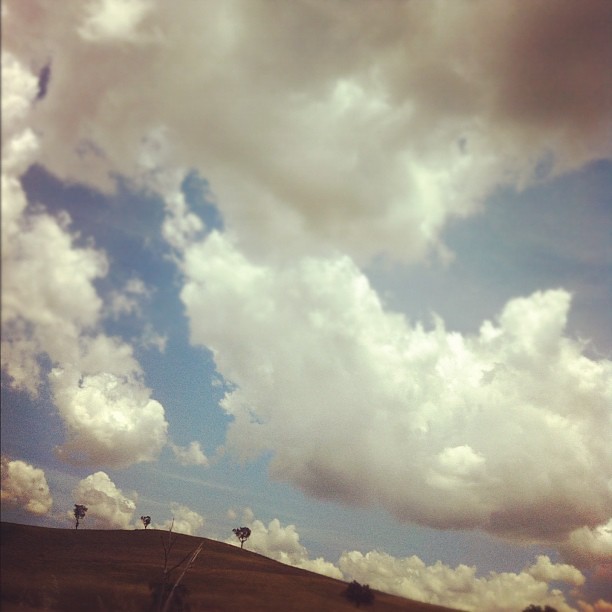
A day in the country III
The skies are just so big in the country, making the landscape so small.

Another gorgeous day in the BM's. This was taken a few days ago on first sunny day.
I love taking friends from afar here and see the looks on their faces when they first spot this gorgeous view

On a chilly night I dream of paradise.
Although I managed to get lost on this circuit trail (!), it didn't bother me with a view like this to distract me


The Gong #summerherald
I will always look at this view and think fondly of you ~ how we all miss you ♥

Here's the Deal:


Head over to Blurb and take a look at the book, you can preview about 15 of the 60 pages. If you like the sample enough, click on add to cart. And this is where you'll be helping me out. My earnings from each book is set to $5.00 and I'm going to pledge each $5.00 earned from each book sold to my Ride to Conquer Cancer that is happening later this year.


Who is this book perfect for?


* Those in a hurry to get through a book and say, "Yeh, I finished a book in a day". (There are NO words in the book! That's a bonus right there!)
* Those who are into iPhoneography and dig the faux-retro feel you can apply to images using the various apps rendering the world an arty-farty wonderous place.
* Those who hate iPhoneography and belong to "I Hate iPhoneography" clubs. They could take my book along to one of their meetings and make it a point of discussion.
* Those that live in Australia and love this wide brown land of ours and can't get enough of seeing images from all it's parts.
* Those that can't wait to save their pennies and visit this wide brown land of ours - this book contains a teeny little fraction of what they can expect to see when they visit.
* Those creative writers who look for inspiration in images - there's plenty of white space around the images for you to jot some notes down for your next plot.
* Those who love online shopping and getting parcels delivered to their door while wearing pj's and slippers. They could buy it for themselves, or even a loved one (notice the ♥ shaped tree on the front cover!!)How perfect would this be as a gift!
* Those that are starting out in photography and want to use their iPhone as a practice tool - this book may help them to see the world around them with new eyes.
* Those who have had a family member or friend affected by cancer and who don't mind forking out about A$26.95 of which $5.00 goes to Ride to Conquer Cancer. The book can be a sort of super fancy receipt of their donation.
* Those that have been lucky enough not to have any friends or family affected by cancer and see the A$26.95 (with the $5.00 going to Ride to Conquer Cancer) as a testament to their lucky break they have been spared the anguish, stress and world-will-never-be-the-same-again feeling that comes with a cancer diagnosis.
* Those that are just plain nice and aren't necessarily into iPhoneography, but have a spare A$26.95 of which $5.00 goes to Ride to Conquer Cancer, and don't mind helping out a gal with her goal, whilst helping others along the way.

If I've left any other types of people who you think would love to buy this book, then drop me a line and I'll add them to the list.

 What's that? What else can you do? Well, I'd love it if you shared, tweeted, facebooked, google+, tumblered, stumbled, and basically shared the shit out of this post! I would love to be able to write a future post letting you know just how many $5.00 donations were transferred from the Blurb account to the Ride to Conquer Cancer fund.


Monday, 14 January 2013

How to Watermark your Images

It's about this time of year that I consider updating the watermark I use when I add images to sites such as Flickr. The trouble with this is that I can never seem to remember how I did the previous one... Add to that, I've also been asked by a couple of friends to show them how to add watermarks to their images, so I thought I'd write a step-by-step of how I created this current watermark.


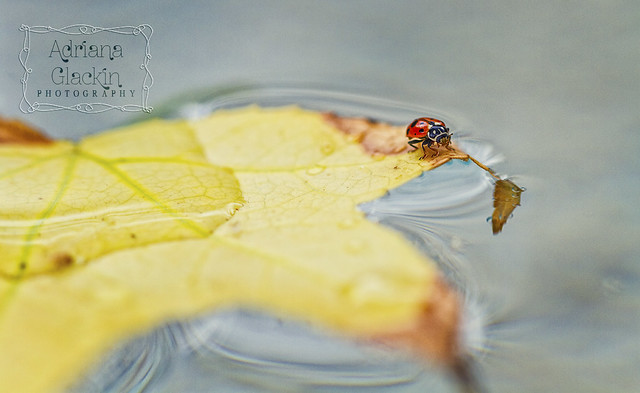
ladybird I 

1. Choose a font, any font, preferably one you like and that can be a sort of signature for you. No doubt you have hundreds of fonts on your computer, so open up a document, type your name (or whatever text you want to use for your watermark) and have a play with the fonts you already have. If you're not happy you have The Font, then turn to the internet - that's what it's there for! I found this font from dafont and it's called znikomit No24 by gluk. The swirly frame was one I had made and used for a previous project, but you don't need to use a frame for your watermark.

2. I use PS but I'm sure that any photo editing software can be used. (These instructions will be PS oriented.) Open up a new file to a size of 4300 x 2300, set layer to white. But to be honest, the size can be approximate, as you'll re-size the watermark down to size according to each image you watermark.

3. Select the text symbol and then select a text colour. I've chosen #a6a6a6 for mine. Type your name on that layer.


4. Go to your Layers menu and select Blending Options. Because the font I have chosen is quite fine, I've selected Bevel and Emboss as well as Drop Shadow. Depending on the font you choose, you may find this step unnecessary. I have also selected Colour overlay and set it to negative image.
 

You can see the effect of the blending options on a heavier font:


5. I added my swirl frame on a new layer and inversed the colours (it was black, inversed to white) then applied the same blending option as above:


At this stage, it's still too 'dainty' and almost invisible on even the plainest of images. This won't be the case if the font you have chosen is bulkier. If you have chosen a dainty font and/or frame, simply duplicate both the text and frame 2 or even 3 times. Practice popping the watermark on one of your images to see if you're happy with the effect. You may find that you don't need to duplicate the blending effect on each duplicated layer, so simply disable the blending option as you see fit.

6. Once you're happy with the watermark, it's time to group all the layers together using the "Create a new Group" option in the Layers palette (red circle). Drag each layer onto the new folder (green circle). You will notice the Blending Mode is now "Pass through". Save this as a .pdf file:


7. Time to grab one of your images and test out your new watermark. Grab your folder, you'll notice I've called mine "ZNIKO grey" and copy that to one of your open images. How you size the watermark, where you position it and how you blend it to your photo will depend on each image and of course your own personal preference:


So now you should be good to go. I hope you've found this How To easy to follow and implement..

What are your thought on watermarks? Do you use them?  If not, I'd love to hear why. 
 
If you have any questions, drop me a comment.

Friday, 4 January 2013

Featured Image over at Photographers Connection

I can't tell you how tickled pink I am at having my final image of the "Photographer's 52-Captures Challenge" chosen as Fan Photo of the Week! Following their themes, I was determined to create a new image for each week and what a great opportunity that has been to improve my skills and try things that I would probably never get around to trying. Photographers Connection have started a new 52 week challenge for 2013, but I'll be sitting this one out as I'll be concentrating on a few other challenges this year. A major challenge for me will be the Ride to Conquer Cancer that will take place in October 2013.To find out more, caste your eyes to the left of this page and click on the blue and yellow cycling link. I would love it if you could support my ride :)

Week 52 ~ Self-Portrait
Week 52 ~ Self-Portrait | Celebrating the end of the project - yeh!

Are you a fan of Photographers Connection Facebook page? Maybe you should 'like' their page and join in the fun! Have you tried photography projects before? Other than Photo-a-Day and 52-week challenges, what other photography challenges have you tried? Drop me a comment, I would love to hear about your photography challenges and projects.

Wednesday, 2 January 2013

Happy New Year! Especially to you, Overzealous White T-Shirt Hero Dude

Happy New Year! And yes, I also wish the overzealous White T-Shirt Hero Dude a Happy New Year, even if he did almost ruin the start of the year for me and quite a few other people. Against my normally conservative and no-extreme-action disposition, I said yes to going out on a little boat with a few friends on Sydney Harbour for New Year's Eve. Surprisingly, every other person who owns a boat had the exact same idea. Who knew? Aside from the congestion of what must be the Harbour's busiest day, seeing the fireworks from the vantage of the water was really something quite special. So special, I recorded a few clips using my iPhone and edited them and, as you do, popped the finished clip up on youtube:


The atmosphere, the sound, the light spectacular just isn't the same as watching it on the telly even if you do own one of those fancy-dancy tellies. And it's not the same as watching it on the above clip, even if it was shot on an iPhone... Of course at the end of the awesome display - you're not going to believe it - but all the owners of all those boats want to go home or at the very least, be the first one to reach the jetty. And that's where Overzealous White T-Shirt Hero Dude comes into this story. Aside from making bogan comments to those at the start of the queue for taking too long (!), he then proceeded to "help" those boats tied up and waiting for their trailers to arrive. Unfortunately for us,  the trailer for the boat I was on,was parked a million miles away, but that didn't deter Overzealous White T-Shirt Hero Dude from untying the boats, moving them forward and then tying them up again. Very helpful. Now, I don't know boat etiquette, but I would imagine that the person who has their trailer first in line at the jetty should be able to get their boat out of the water first no matter where in the boat queue they are. The trouble was, not only had Overzealous White T-Shirt Hero Dude shifted the boat I was on to the front of the queue, in his overzealousness to help everyone else, he had forgotten to get his trailer which was also parked a million miles away, so off he went to retrieve said trailer. With the only driver of the boat I was on somewhere in the never-ending trailer queue, my friend and I were treated to some pretty colourful language as we were abused for positioning the boat where it was in the way of every boat trying to exit the ramp. The colurful language wasn't anywhere near as pretty as the fireworks either. So, thank you Overzealous White T-Shirt Hero Dude for being the hero you were in "helping" all those of us who weren't fast enough for your liking. You very nearly dampened my New Year's spirit with your overzealousness and heroism and total carry on. Luckily for you, those fireworks were the best damned fireworks ever!

Happy New Year Everyone! Especially Overzealous White T-Shirt Hero Dude - may 2013 be the year you truly help out those in need because I'm sure that deep down you are a really helpful dude. Just not in the early hours of New Year's Day.


Friday, 14 December 2012

Merry Christmas

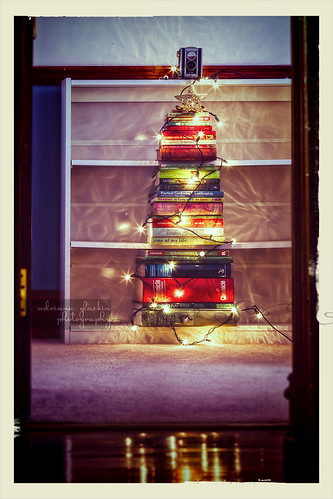
I have been protesting for the last few weeks that I'm over Christmas. Christmas hasn't arrived and already I want it to be over. Yet, despite my protestations I find that I'm photographing all manner of Christmas things. Take a look at this week's #Project52. The theme was "On the Shelf", and I chose to arrange a pile of green and red spined books into a sort-of tree. As though that isn't enough, I wrap Christmas lights around the book tree.
Week 50 ~ On the Shelf
Still not enough to stick to one version of the Books-in-the-shape-of-a-tree-arranged-on-a-shelf theme, but I tried similar versions with "Merry Christmas" overlaid on the image and taken with Lensbaby Composer. There are other compositions that are sitting on the hard drive that may never see the light of day.

And then there are shots taken with the iPhone, all with the excuse of testing out new filters and updated apps:
Merry * Merry * MerryNo willow was harmed in filtering this iphoneograph.Do I love willow? Only if it's all retro and that.Testing the updated Flickr iPhone app :)

Yet I am still insisting I want this silly season to be over. It's too hyped, too commercial, too in-your-face, too greedy, too rude, too guilt-laden, too over-the-top. While I'm loathing the lead up to The Day, I know that the day itself will be great. It will be simple and relaxed and spent with those I love and cherish and who make me laugh.  They'll take my mind off all the crassness that has become Christmas and instead remind me of the true Christmas spirit. I hope that will also be the case for you.

So that is my Christmas wish for you. I hope you spend the day with those who are dear to you, who make you laugh, who bring out the best in you and you in them. I hope that the crassness that is now Christmas hasn't soured your spirit to the point where it spoils your day. If you're feeling like I do, let's get our narkiness over and done with now, so that we can enjoy the precious time we have with family and friends.

I won't promise anymore blog posts between now and the start of the year, so this is it for 2012. Unless I change my mind, of course. Apologies for not being up to date with the #project52 posts, but they will be caught up in 2013.

Merry Christmas and may 2013 be peaceful and joyful and fun. ♥


Thursday, 15 November 2012

Ride to Conquer Cancer 2013


A few weeks ago I sent an email out to all the friends and contacts in my address book. I wanted to let them know that although I hadn't completely lost my mind, I was going to be undertaking a ridiculously difficult challenge in 2013. Much to my amusement, several friends contacted me to let me know that my email was spamming them. Conversation as follows:

Me: Oh hi friend!

Friend: Oh hi, ummm, I think your email is sending out spam.

Me: Oh no! Really! I'm so sorry! I hope your computer didn't get infected by any nasties!

Friend: No, nothing like that. Just some long winded email with lots of links at the bottom. No way was I going to click on those links. Pffftt!

Me: Ummm, did you happen to notice what the blurb was about? Did it happen to mention anything about a bike ride?

Friend: Now that you mention it...it did... a 200km bike ride - No wait... you're not doing that are you? *look of astonishment followed by look of disbelief* Bhahahahaha! You are doing that!

Me: Yeh, I am, and that email isn't spam. It's a real email from me. I wrote that long winded blurb and those links go straight to my page over at the Ride to Conquer Cancer. I'm so excited, it's going to be fun and I can't wait! (and I'm not even joking here people).

Now that I've been able to clear up with a few of my friends that I am indeed doing this challenge and that the email was in no way spam, I'm not offended one little bit that some of my friends think the challenge is beyond ludicrous. (sniff...) And do you know why? Because two friends completed the challenge this year and they said it was fun, and they're never wrong about stuff that's fun. Because I will be joining three friends who have also signed up to take part in this challenge, and it's always easier to face up to a challenge when you're with your friends. Because I know that even though my friends laugh and think it's madness on my part, I know they'll support me in any way they can.

It's going to be all sorts of challenging -  physical, financial and emotional. I knew it would be emotional, but just how emotional was evident when I opened up the email to let me know that one of my friends had left wonderful words of encouragement and had already donated - I burst into tears. It's going to get a whole lot more emotional, isn't it...

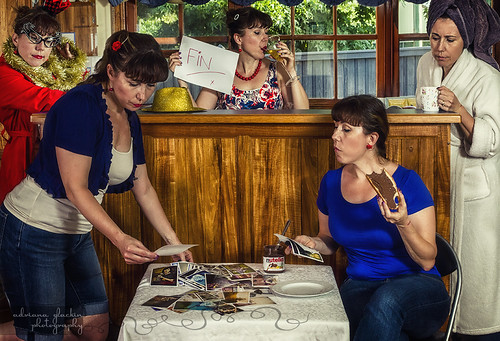
So please, if you've read this far, then do me a favour and please link this on your FB, Google+, twitter or whatever your favourite social networking site is; consider making a donation (anonymously if you prefer); leave me a message of support in the comments below. I'll keep this blog up to date with how the training, and the whole process, is going. Speaking of training, that won't start up for a few more weeks due to some health things that are being finalised. Now, please clickity click on the startled housewife portrait above and view my page to find out more information about this insane challenge.

Oh, forgot to point out that there is a widget in the margin of this blog that directly links you to my page. Do visit and consider donating. Let's see if we can conquer cancer :)

Tuesday, 6 November 2012

The Goodreads App


The regular visitors to my blog may have noticed that I no longer have the "what I'm reading" widget to the side of the blog. That's because I've discovered this great app called Goodreads. It appears to be a networking site for booklovers. You can find your friends, see what they're reading - or what they've read. You can rate and write reviews on books you've already read, add books to a wishlist for future reading, find all sorts of books based on what your friends, and strangers, have recommended. I'm sure there's a lot more you can do on there, but I love the fact that I can use the app on the computer and the iPad and keep track of books I've read and have yet to enjoy. I've recently been listening to some podcasts that mention various novels, and I've found it handy to locate them on Goodreads and add them to my list of "to read". And that's much smarter than any widget on the side of a blog.  If you haven't already joined, and you feel so inclined, then feel free to add me to your list. If joining these sorts of sites just ain't your thang, then feel free to add your favourite book in the comments below.

The above card is also available as a postcard, matted, framed and canvas print.

Note: This post is my opinion only and has not been sponsored by Goodreads, or anyone else for that matter.


Sunday, 28 October 2012

Week 37 ~ Sensual

Week 37 ~ Sensual

I did say I had an exciting announcement to make, but this post isn't it. This post is going to be super short because I have things occupying my mind at the moment and it's too difficult to concentrate on much else. Plus, it's a great excuse to use for this post because I really wasn't looking forward to this particular brief ~ sensual ~ blergh, what even is 'sensual'? When you're on the wrong side of forty and the media only shows you twenty-somethings (and even younger) as the 'model' for womanhood, you do start to feel inadequate, invisible, and well and truly past it. So that every time I thought about this brief during the week, I would wince and roll my eyes and spit out "stupid senshool brief, what the hell am I going to shoot for it"... So this was the result - lensbaby, lots of blur, cropping of the face, dark and B&W. I'm simply too old, too tired, and way too worried about other things to really care. Blergh!

Thursday, 25 October 2012

Week 36 ~ Movement

Filomena had a flat tyre and the august winds to contend with.

Whoever said "to kill two birds with one stone" needs a serious smack in the head because they've obviously never applied this to a photography project. Ridiculous saying that when applied to said photography project, leaves you feeling uber-frustrated and ready to pack in the whole thing. If I remember rightly, I was trying to combine the theme of the Project 52 ~ movement ~ with the sub 12 (a friendly and talented bunch of photographers over on flickr) brief of "little people". These little people are HO gauge people used by railway enthusiasts to populate the mini towns they create in their lounge rooms or garages. I mean, it would be silly to go to all the trouble to build a miniature railway setting complete with town and surrounding countryside, and not have little people to populate them. It wouldn't be normal at all, and be a bit zombie apocalype-like to not include these 2cm high humans in the settings. And yes, you read correctly, they are 2cm or so in height, if you don't believe me, then check here, here and here to see the wide variety of little characters you can buy from your favourite hobby store.

I tried to create a scene what showed both the little person and movement and I can tell you it was a most frustrating day. So much so, that when I saw the Canon Photo5 briefs this year included a "little people" brief, well I'll keep it polite and say that I simply exclaimed "oh fiddlesticks". Needless to say, I enjoy what little sanity I have and so submitted the above image to the Photo5 brief. Click here if you would like to see all my submissions for this year's Photo5.

Speaking of sanity or lack thereof, stay tuned to this blog, for an exciting and most ridiculous announcement shall be made in the coming days.


Tuesday, 16 October 2012

Week 35 ~ Glass

Week 35 ~ Glass II

You know, perhaps I should have combined this post with the last, as I was still enthralled with the whole capturing water thang. While this week's theme was glass, I couldn't resist using some food colouring and a fast running tap (sorry Sydney Water...) to shoot even more images of water, this time - in a wine glass! And talk about a ghetto set up, the above shot was set up in the kitchen sink with the OCF pointing to the side of the sink and bouncing onto the glasses I had set up in the sink. Of course, the blur and bokeh is due to the Lensbaby Composer, a most magical lens.

The shot below used a similar set up, this time instead of the kitchen sink, I had the wine glasses placed within a white box and bounced the OCF away from the glasses thereby diffusing the light. Using selective focus, I wanted to convey the 'barely there' qualities glass can sometimes have:

Week 35 ~ Glass III

If you are interested, the first image above is available for sale over at Red Bubble here.

Sunday, 14 October 2012

Week 34 ~ Water

Week 34 ~ Water

Just when you think photography can't possibly get any more addictive, you stumble upon the water drop technique. Not having time to shoot any other forms of "water" for this week's theme, I set about trying to capture a water drop in motion. The youtube tutorial below is the one I followed - very easy to understand and you don't require a lot of fancy-dancy equipment. I highly recommend you watch it and then gather all your gear and start having some fun:


The shot required very little editing, just some curves, levels and saturation alterations. Had I not filled the 8GB card, twice, I would have happily kept shooting for the rest of the evening. A little too addictive is this capturing of falling water drops... Especially when you think the next shot is going to be The Shot... Even though the dozens and dozens of shots you've already taken qualify as being The Shot! Here's another shot from the same session:
Week 34 ~ Water

Go on, I dare you to watch the tutorial above and resist the urge to experiment with this technique! Try it out using food colouring, milk or other liquids.

These images are available for sale over at Red Bubble here and here as well as over at Artflakes, here.

PS. I know. This week is actually Week 42 and not week 34 at all. I'm simply trying to slow down time for you :)

Red Bubble Gallery

Red Bubble Gallery
view my photography at Red Bubble